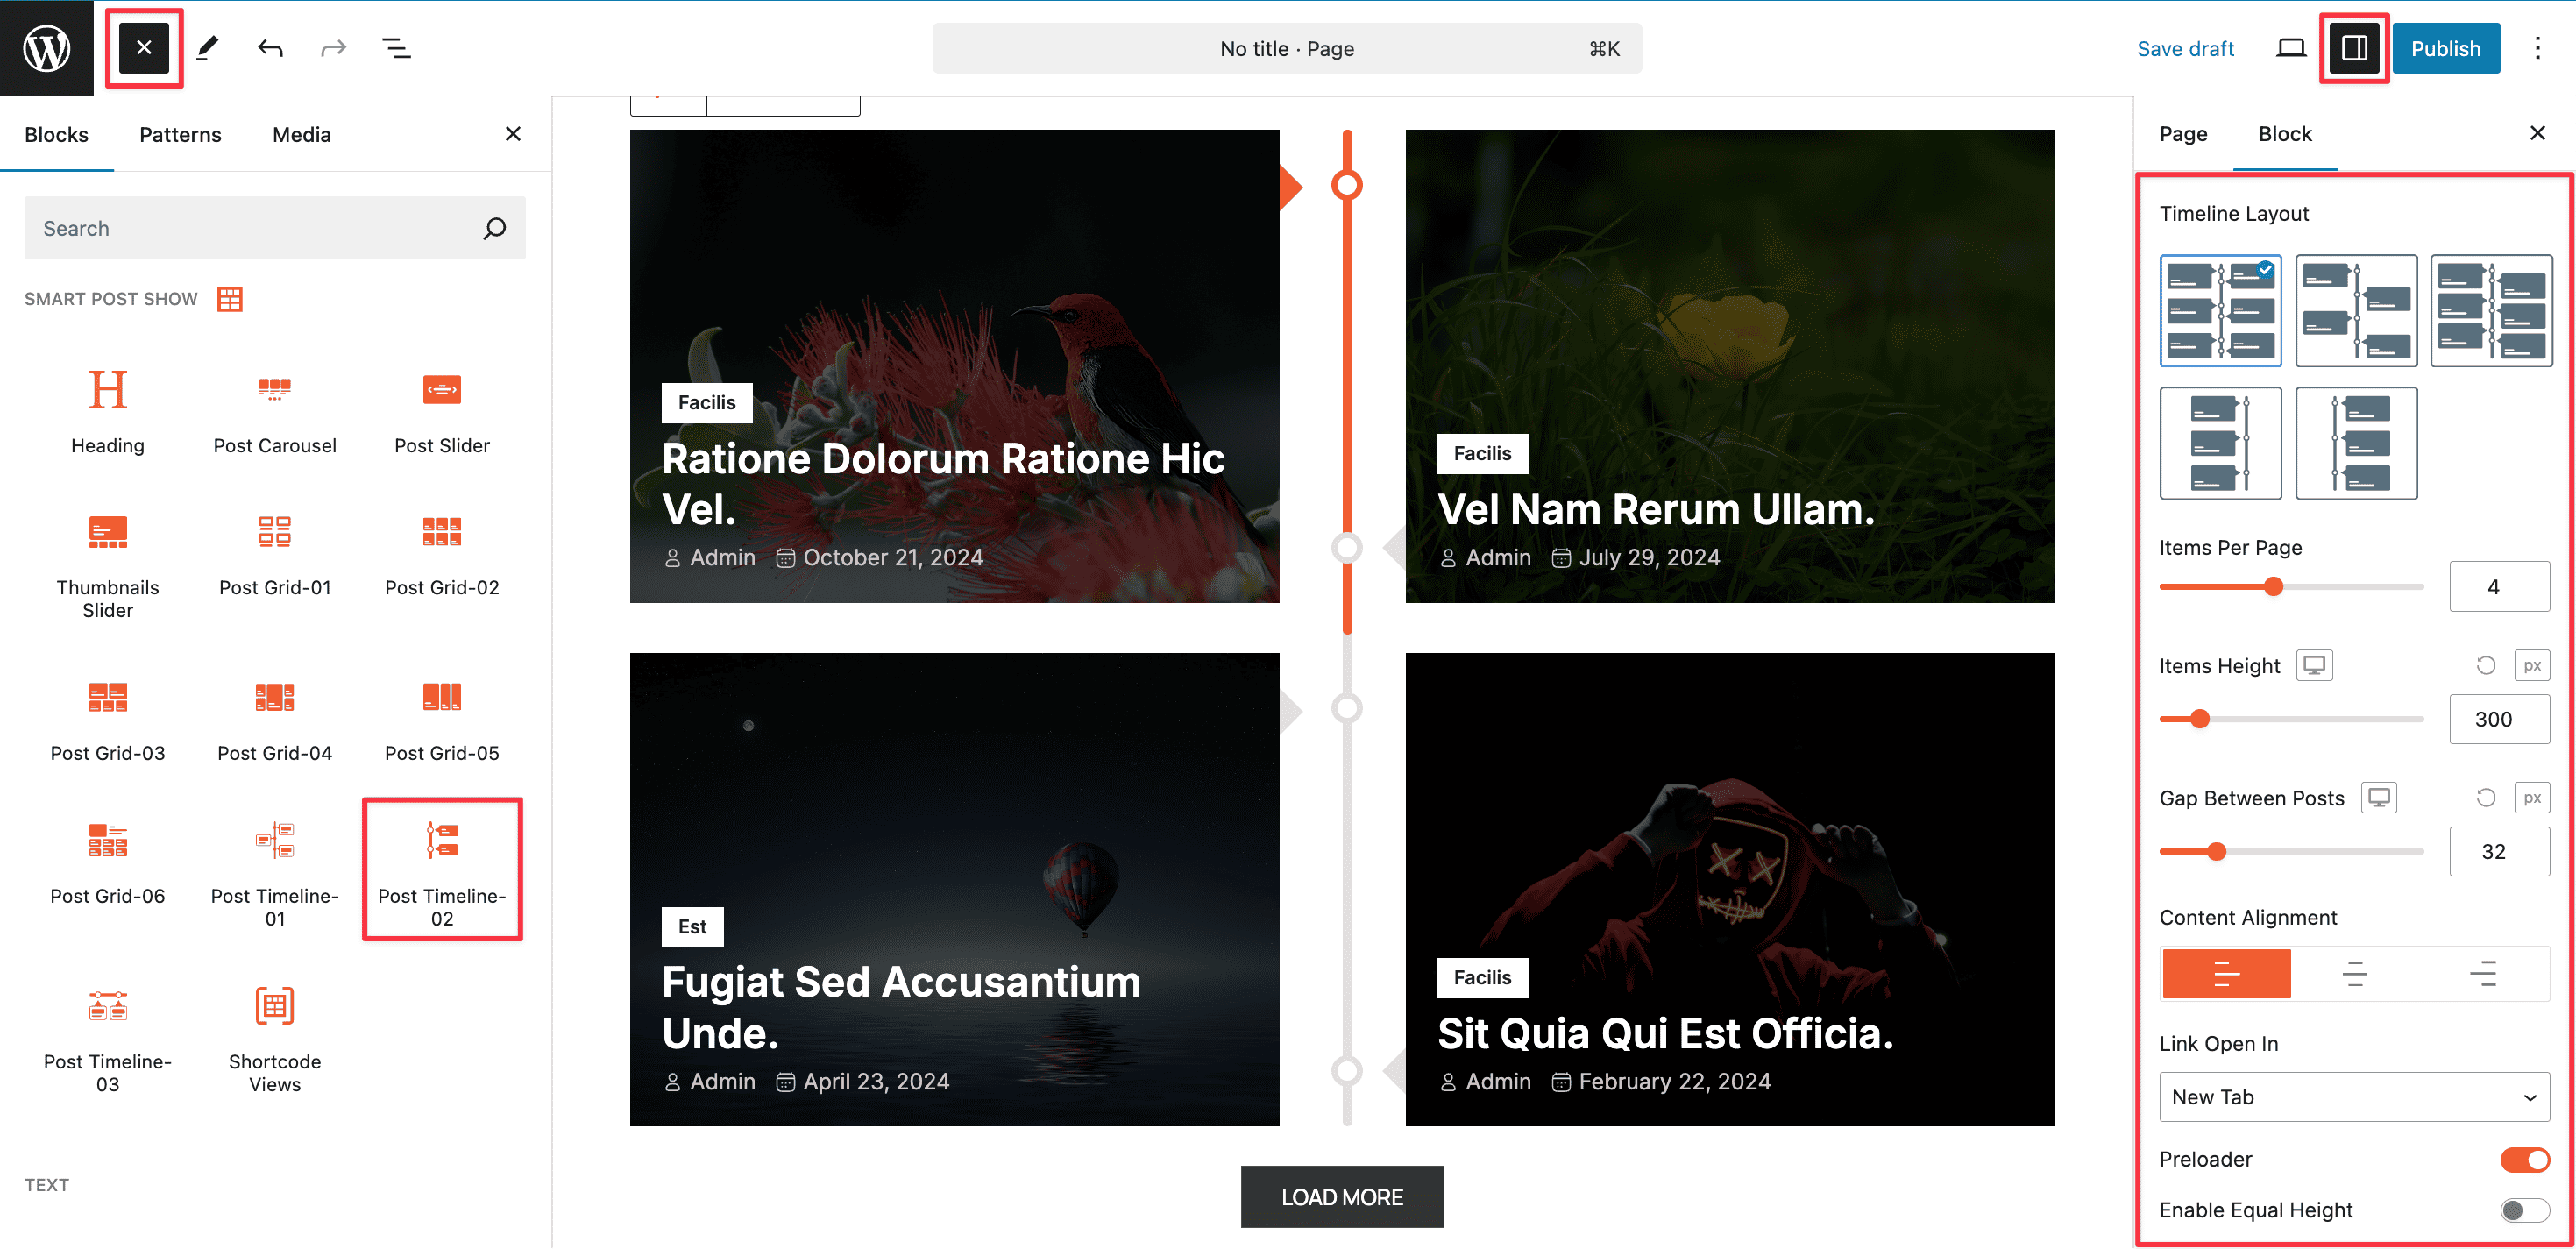
The Post Timeline – 02 Block allows you to showcase your posts in a vertical timeline format. It’s perfect for storytelling, event histories, milestones, or blog series—giving your readers a unique and engaging way to explore content over time.
Step 1: Add the Post Timeline – 01 Block
- Go to your WordPress Dashboard.
- Navigate to Pages > Add New (or edit an existing page).
- In the Block Editor, click the “+” (Add Block) button.
- Search for “Post Timeline – 01”.
- Click to insert the Post Timeline – 01 Block into your page.
Step 2: Customize Your Timeline
The Post Timeline – 01 Block offers a powerful set of customization options, allowing you to control how your timeline looks, feels, and functions. You can effortlessly customize Timeline Layout and Orientation, Timeline Connector, Date Positioning and Formatting, Spacing and Timeline Markers, Content Display (title, excerpt, meta, etc.), Thumbnail and Media Styling, Hover Effects, and Animation.
Customization Tabs
Once the block is added, you’ll see a range of customization options on the right-hand panel of the editor. These tabs include General, Timeline Connector, Pagination, Query Builder, Ajax Live Filters (Frontend), Content Area, Image, Title, Taxonomy/Category, Meta Data, Excerpt, Read More, Social Share, Advertisement, and Advanced.
You can see the live Preview of your customization instantly. Once you’re done with the design, click Publish or Update.