With the Post Carousel Block, you can display your posts in a stylish, scrollable carousel. Here’s how to add it to your WordPress page and customize it to match your needs.
Step 1: Add the Post Carousel Block
- Go to your WordPress Dashboard.
- Navigate to Pages > Add New (or edit an existing page).
- In the block editor, click the “+” (Add Block) button.
- Search for “Post Carousel”.
- Click to insert the Post Carousel Block into your page.
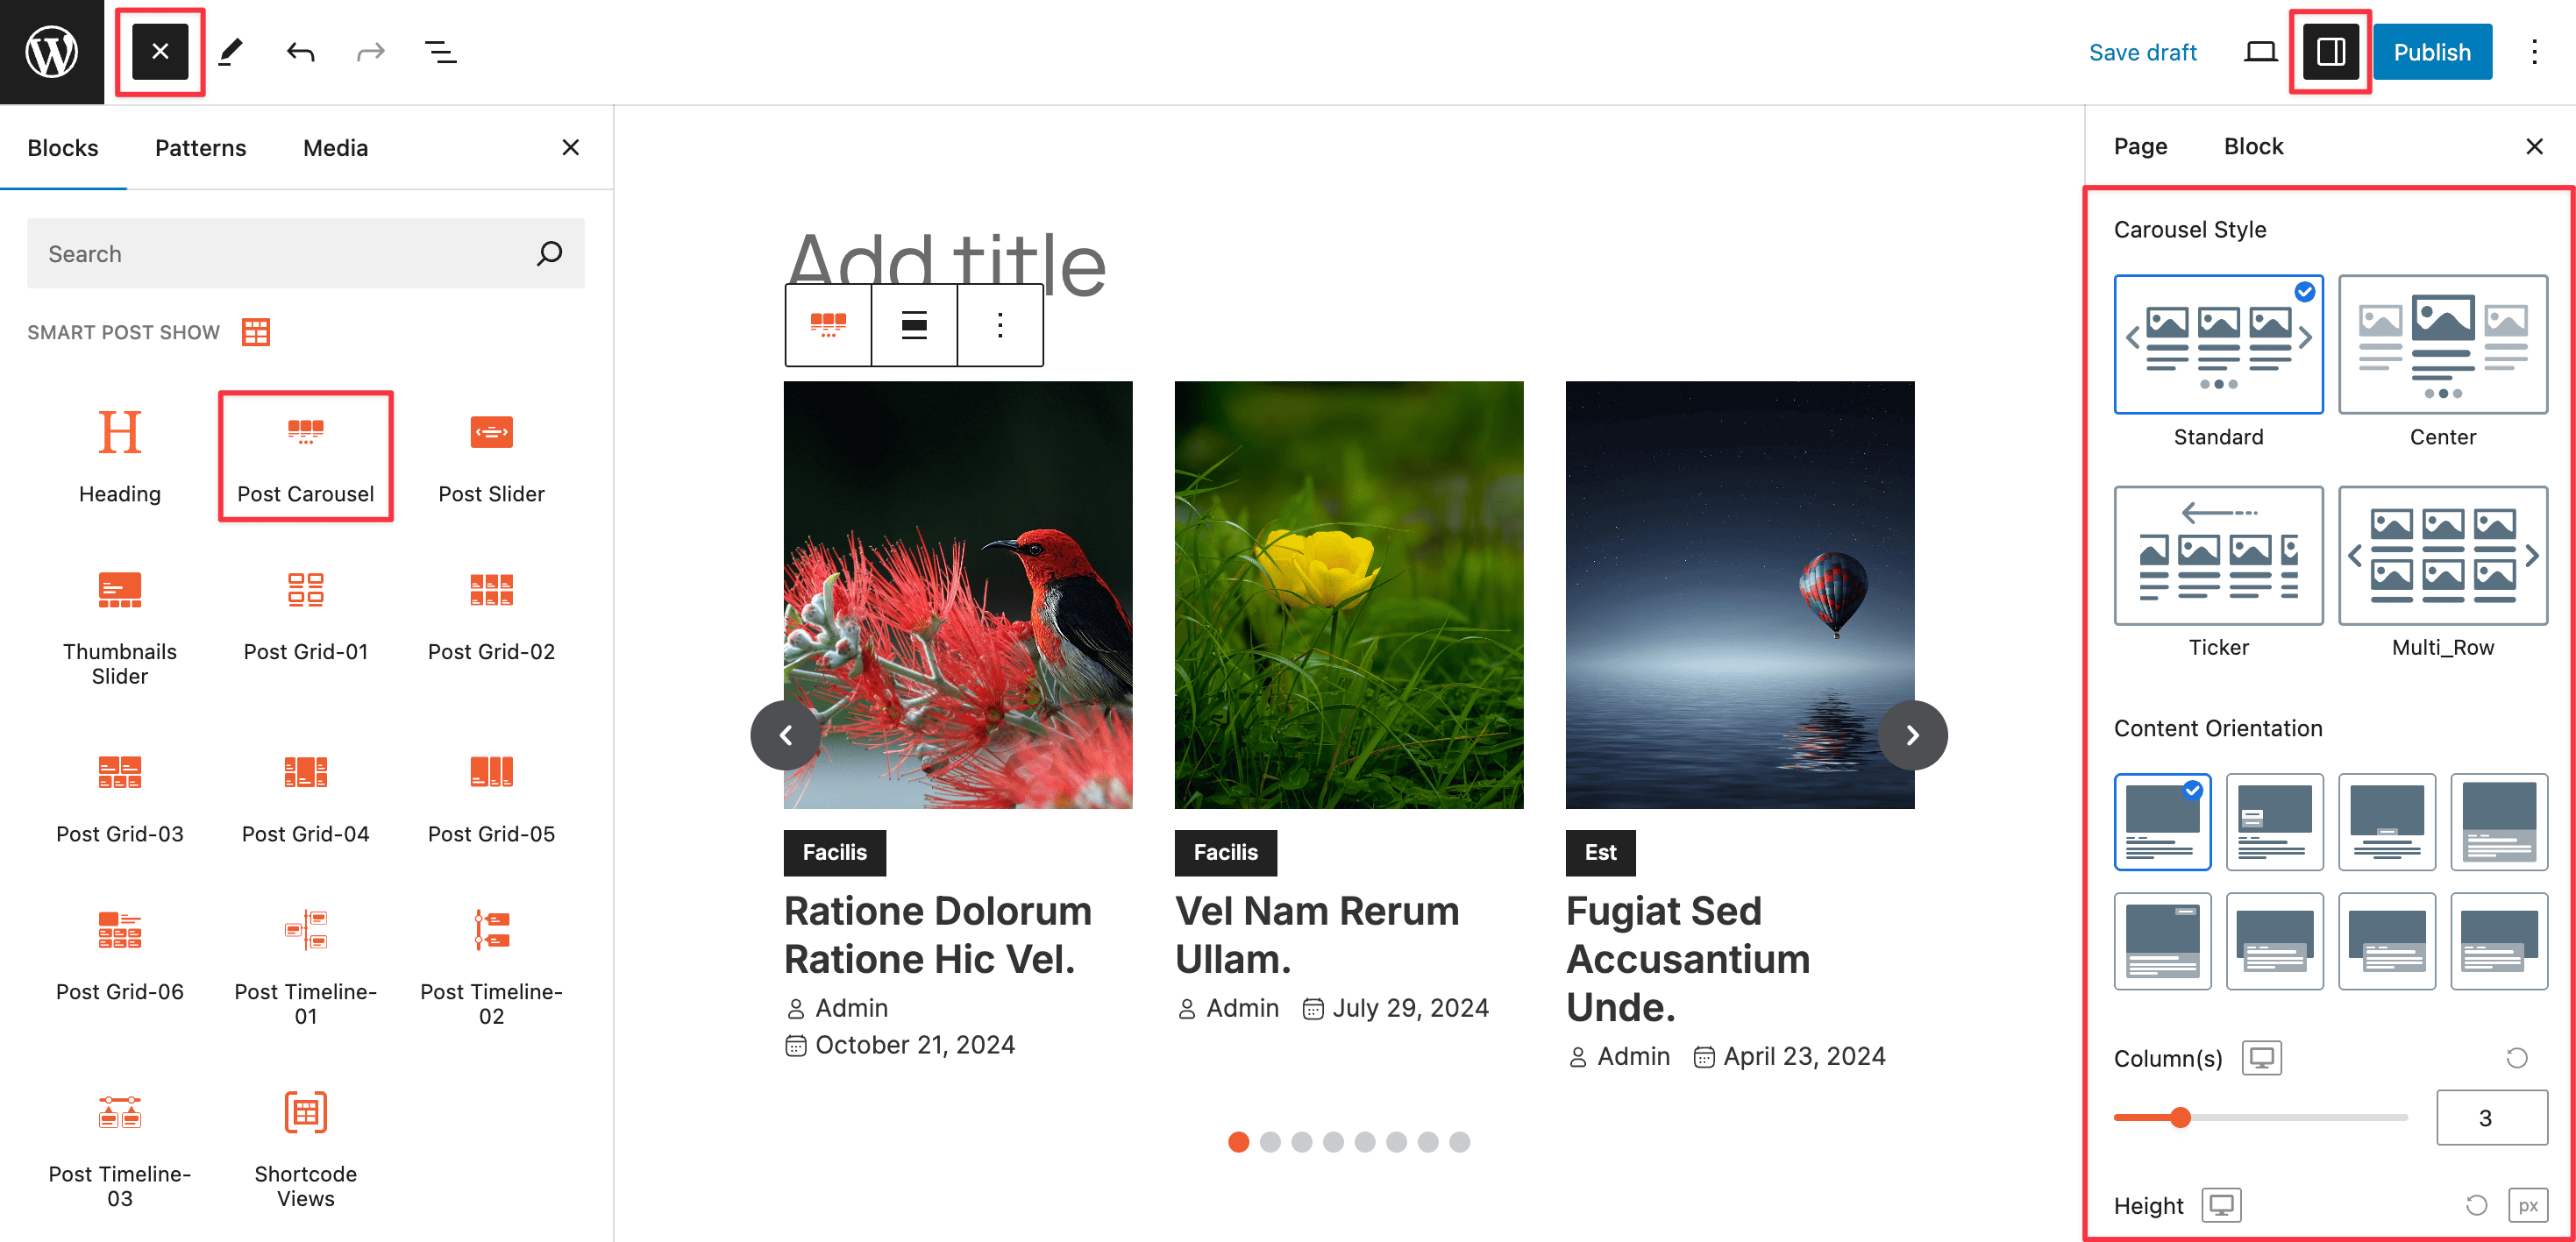
Step 2: Customize Your Carousel
The Post Carousel Block comes with tons of customization options. Whether you’re highlighting blog articles, featured stories, or category-specific content, this block offers complete flexibility and design control.
With a wide range of customization options, users can effortlessly fine-tune Carousel Styles, Orientation, Height, Gap, Direction, Content Visibility, and much more. The block also supports powerful Query building, AJAX live filtering, and advanced Content Styling for post titles, taxonomy, metadata, descriptions, and media elements.
Customization Tabs:
Once the block is added, you’ll see a panel on the right with a lot of customization tab including Carousel, Navigation Arrow, Pagination Dots, General, Query Builder, Ajax Live Filters (Frontend), Content Area, Image, Title, Taxonomy/Category, Meta Data, Excerpt, Read More, Social Share, Advertisement, Advanced.
You can see the live Preview of your customization instantly. Once you’re happy with the design, click Publish or Update.
