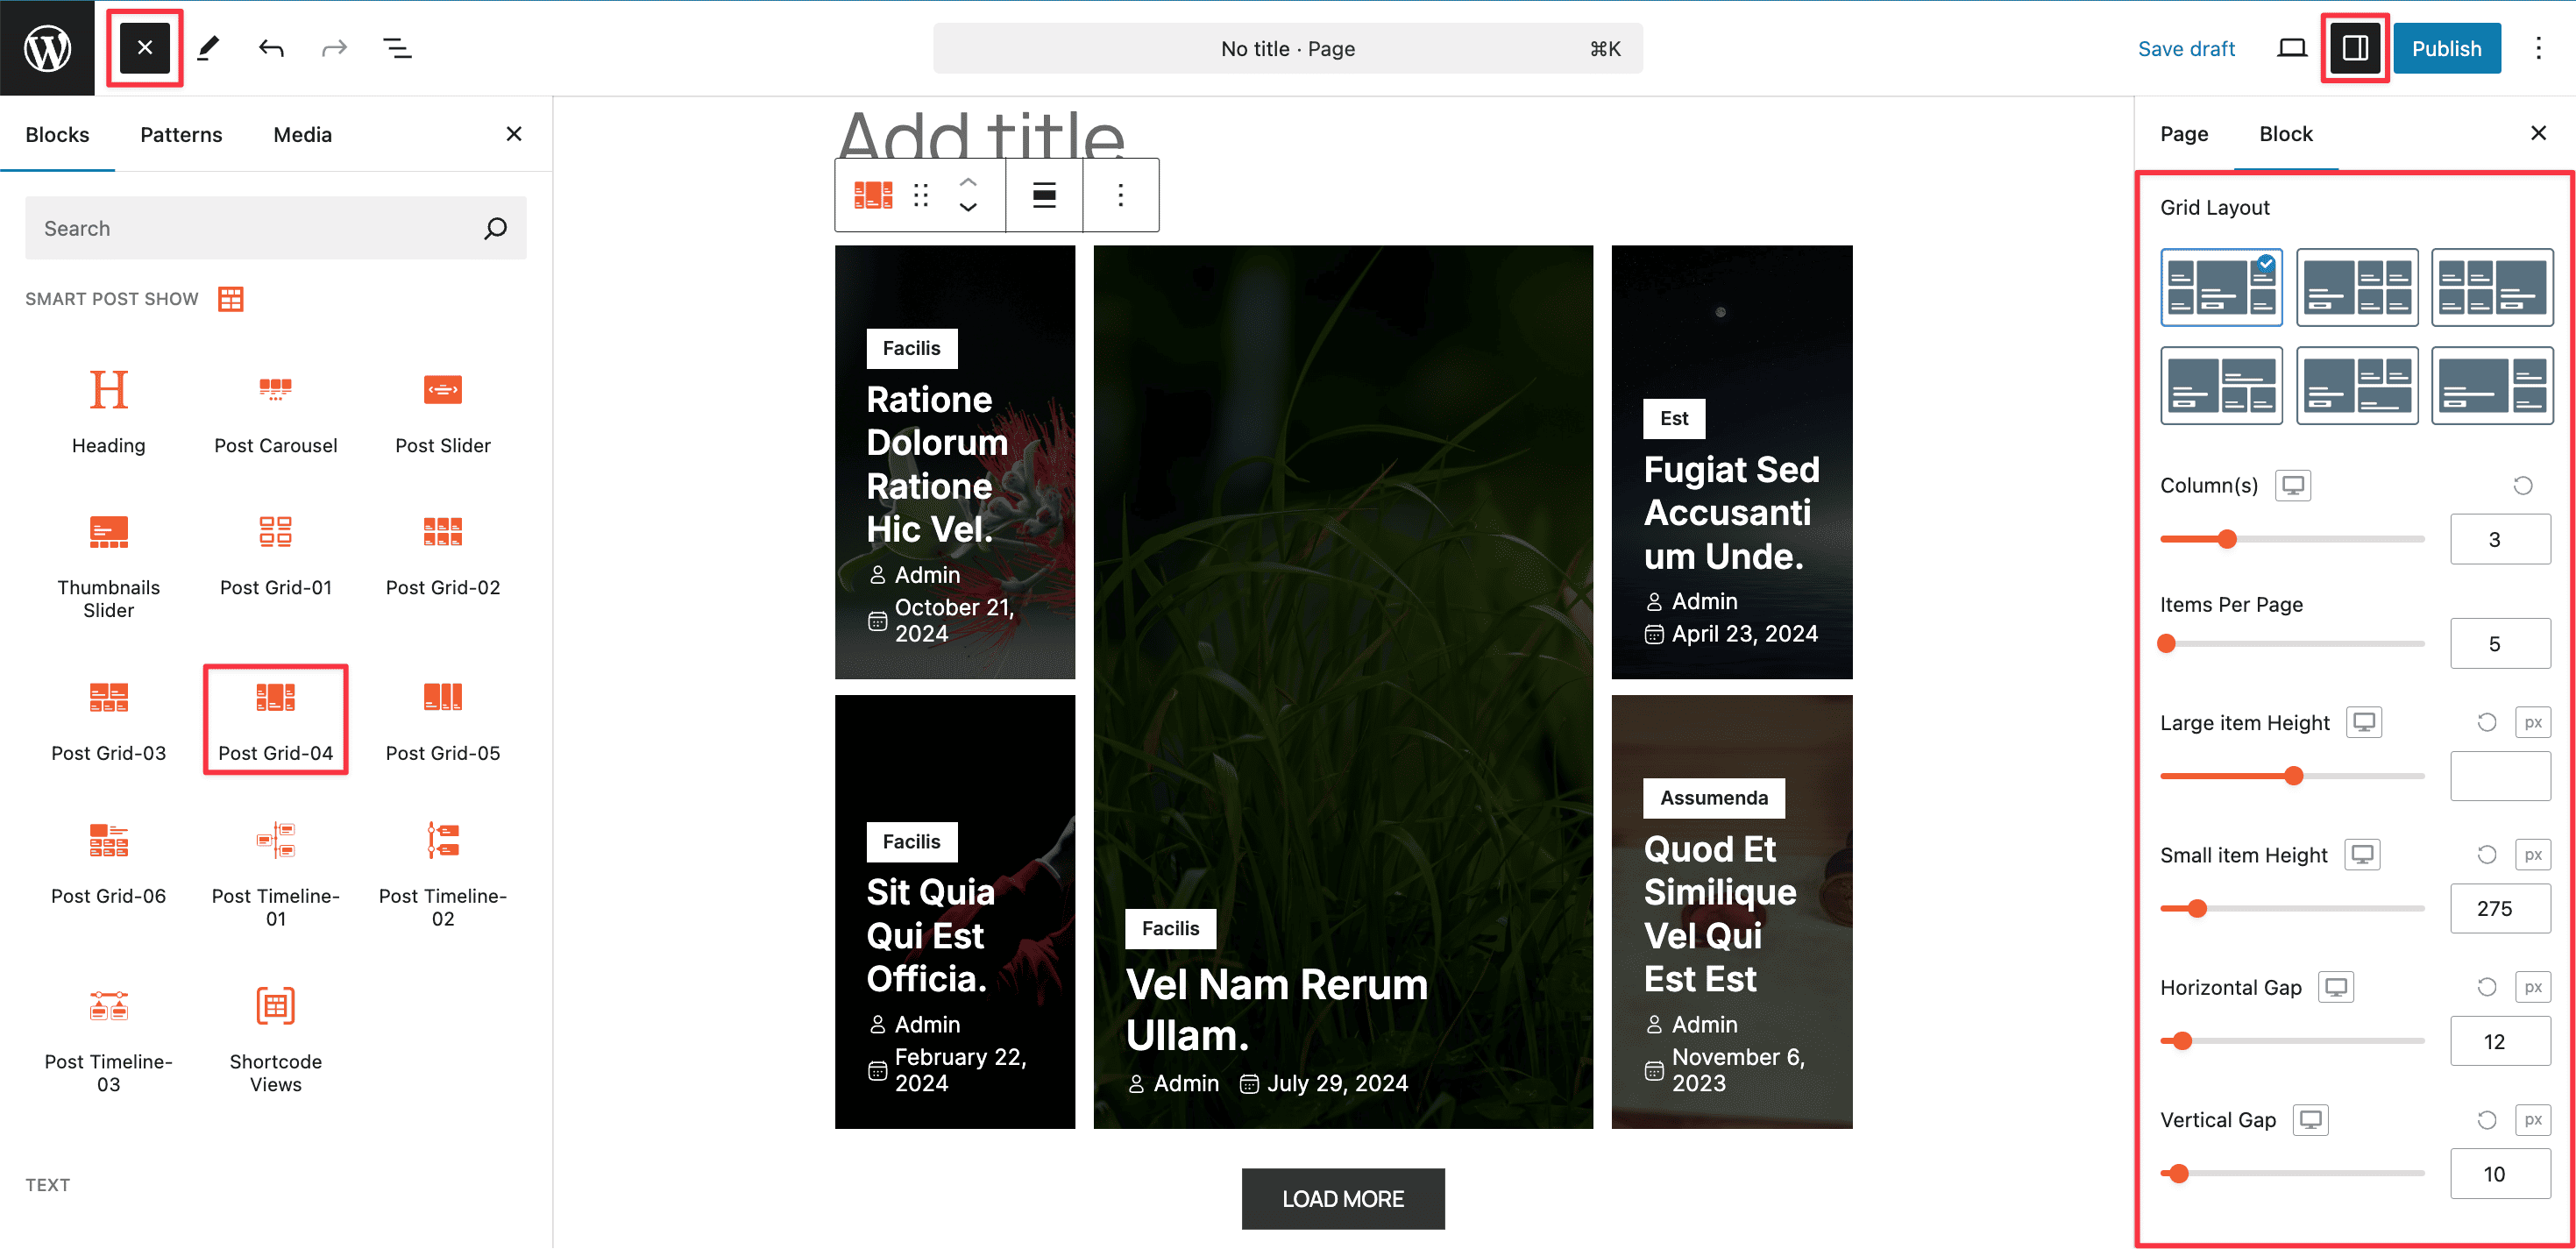
With the Post Grid-04 Block, you can display your posts in a clean, organized grid layout—perfect for blogs, portfolios, product listings, and more. It allows you to present your content in a structured, visually appealing format that enhances readability and engagement.
Step 1: Add the Post Grid Block
- Go to your WordPress Dashboard.
- Navigate to Pages > Add New (or edit an existing page).
- In the Block Editor, click the “+” (Add Block) button.
- Search for “Post Grid”.
- Click to insert the Post Grid Block into your page.
Step 2: Customize Your Post Grid
The Post Grid Block comes with numerous customization options, giving you full control over the appearance and behavior of your grid layout.
With a wide range of settings, users can effortlessly fine-tune: Grid Layout (columns, rows, alignment), Spacing and Gaps, Post Count and Order, Content Visibility (title, excerpt, meta, etc.), Hover Effects and Image Settings, and Responsive Behavior.
Customization Tabs:
Once the block is added, a set of customization tabs will appear on the right-hand side of the editor. These tabs include General, Pagination, Query Builder, Ajax Live Filters (Frontend), Content Area, Image, Title, Taxonomy/Category, Meta Data, Excerpt, Read More, Social Share, Advertisement, and Advanced.
You can see the live Preview of your customization instantly. Once you’re done with the design, click Publish or Update.