Suppose, you have installed WordPress. If you do not know how to install WordPress, contact your hosting provider or see the documentation. We provide one of the easiest setups you will experience, it’s fast and highly intuitive. Simply follow these quick steps and enjoy the smooth work of the plugin.
For the plugin to work as it should, the WooCommerce plugin has to be installed and enabled.
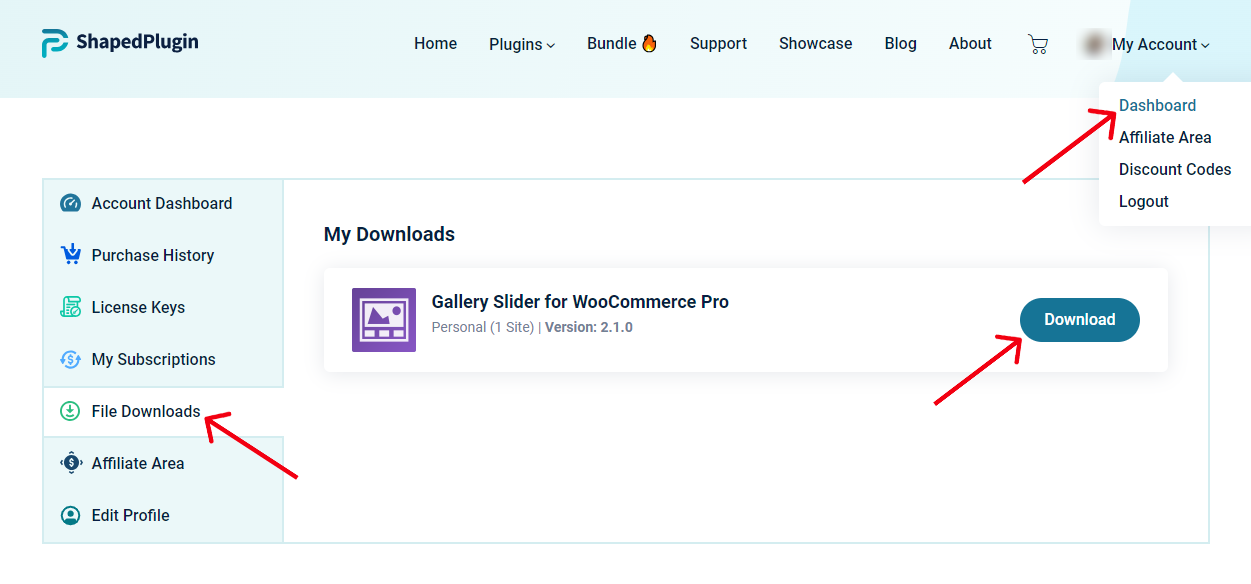
Firstly, Download Gallery Slider Pro for WooCommerce.
- Download the Pro version from My Account→ Dashboard→ Downloads.
Secondly, Install Gallery Slider Pro for WooCommerce.
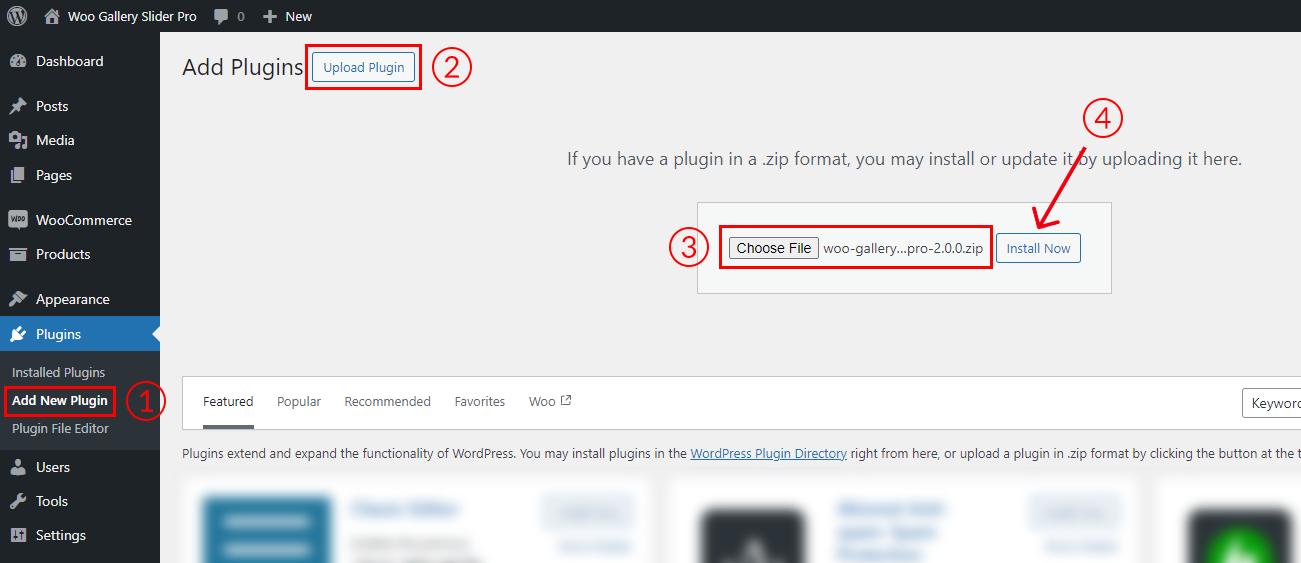
Now follow these steps below to install Gallery Slider Pro for WooCommerce.
- Go to your WordPress Dashboard > Plugins > Add New Plugin.
- Click on the Upload Plugin button from the top left corner.
- Now from the Choose File option select the plugin’s zip file woo-gallery-slider-pro.zip.
- Click on Install Now and then Activate Plugin.
- After activating the plugin you will be redirected to the License key input field.
- Add the license and click on Acitvate. Now you are ready to add product gallery images and display them beautifully on your Product Single pages.