Creating a WooCommerce Product Slider or Grid is super easy and fast. It can be done within a minute.
STEP 1: GENERATE PRODUCT SLIDER SHORTCODE
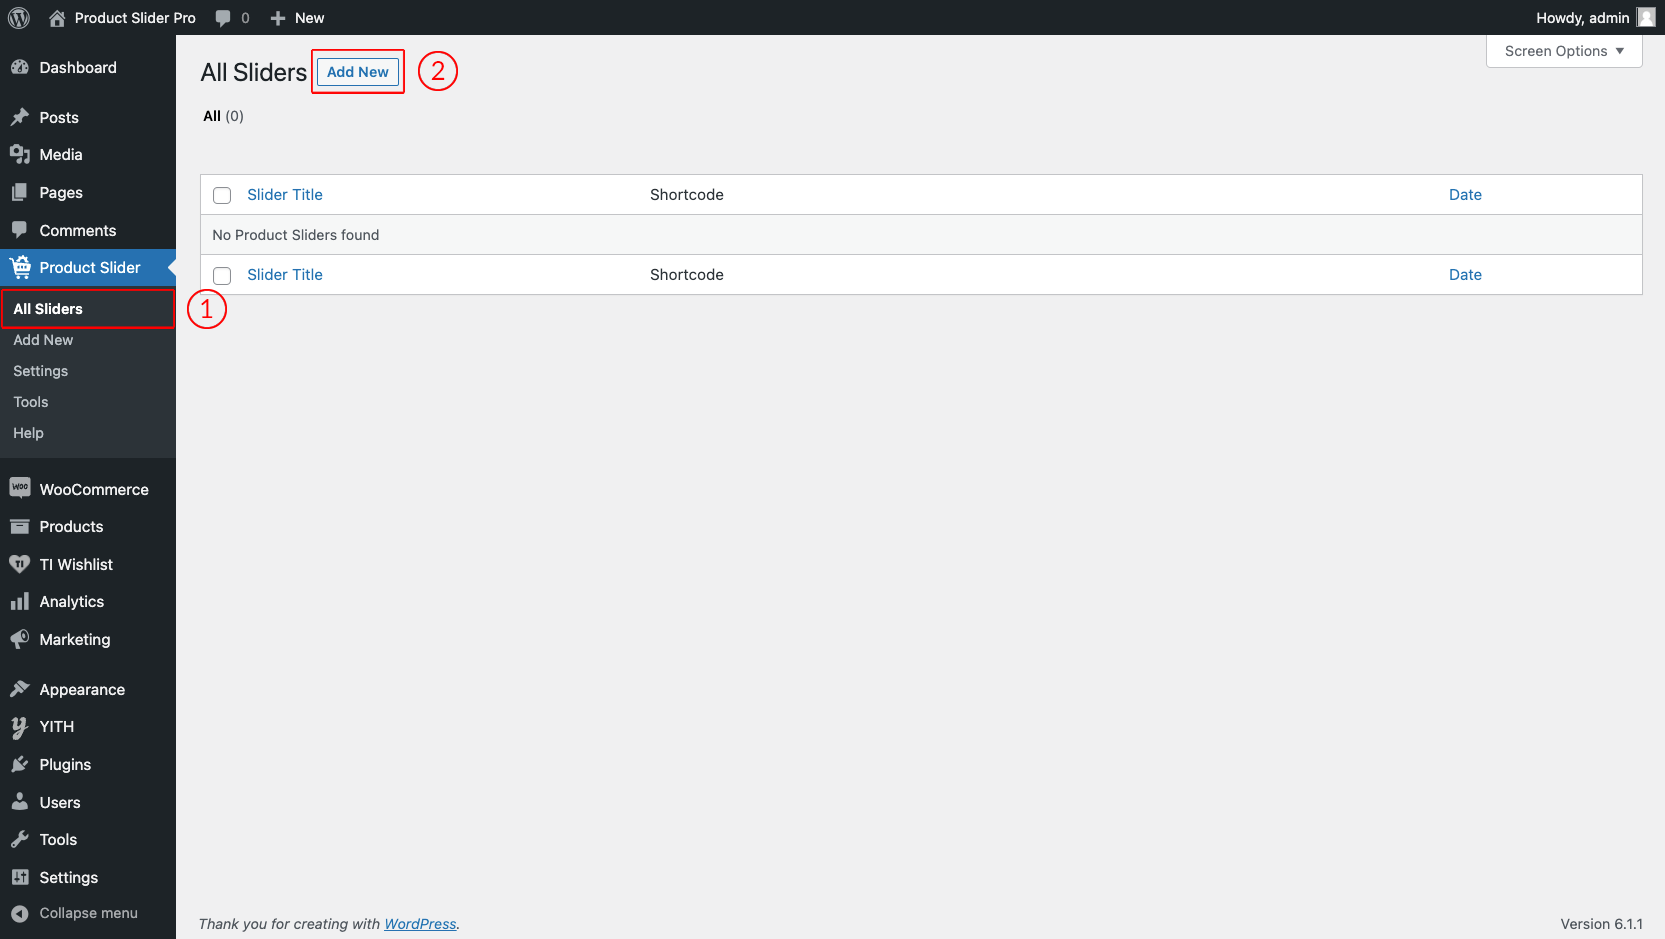
(1) Click on the All Sliders menu.
(2) Click on the Add New button.
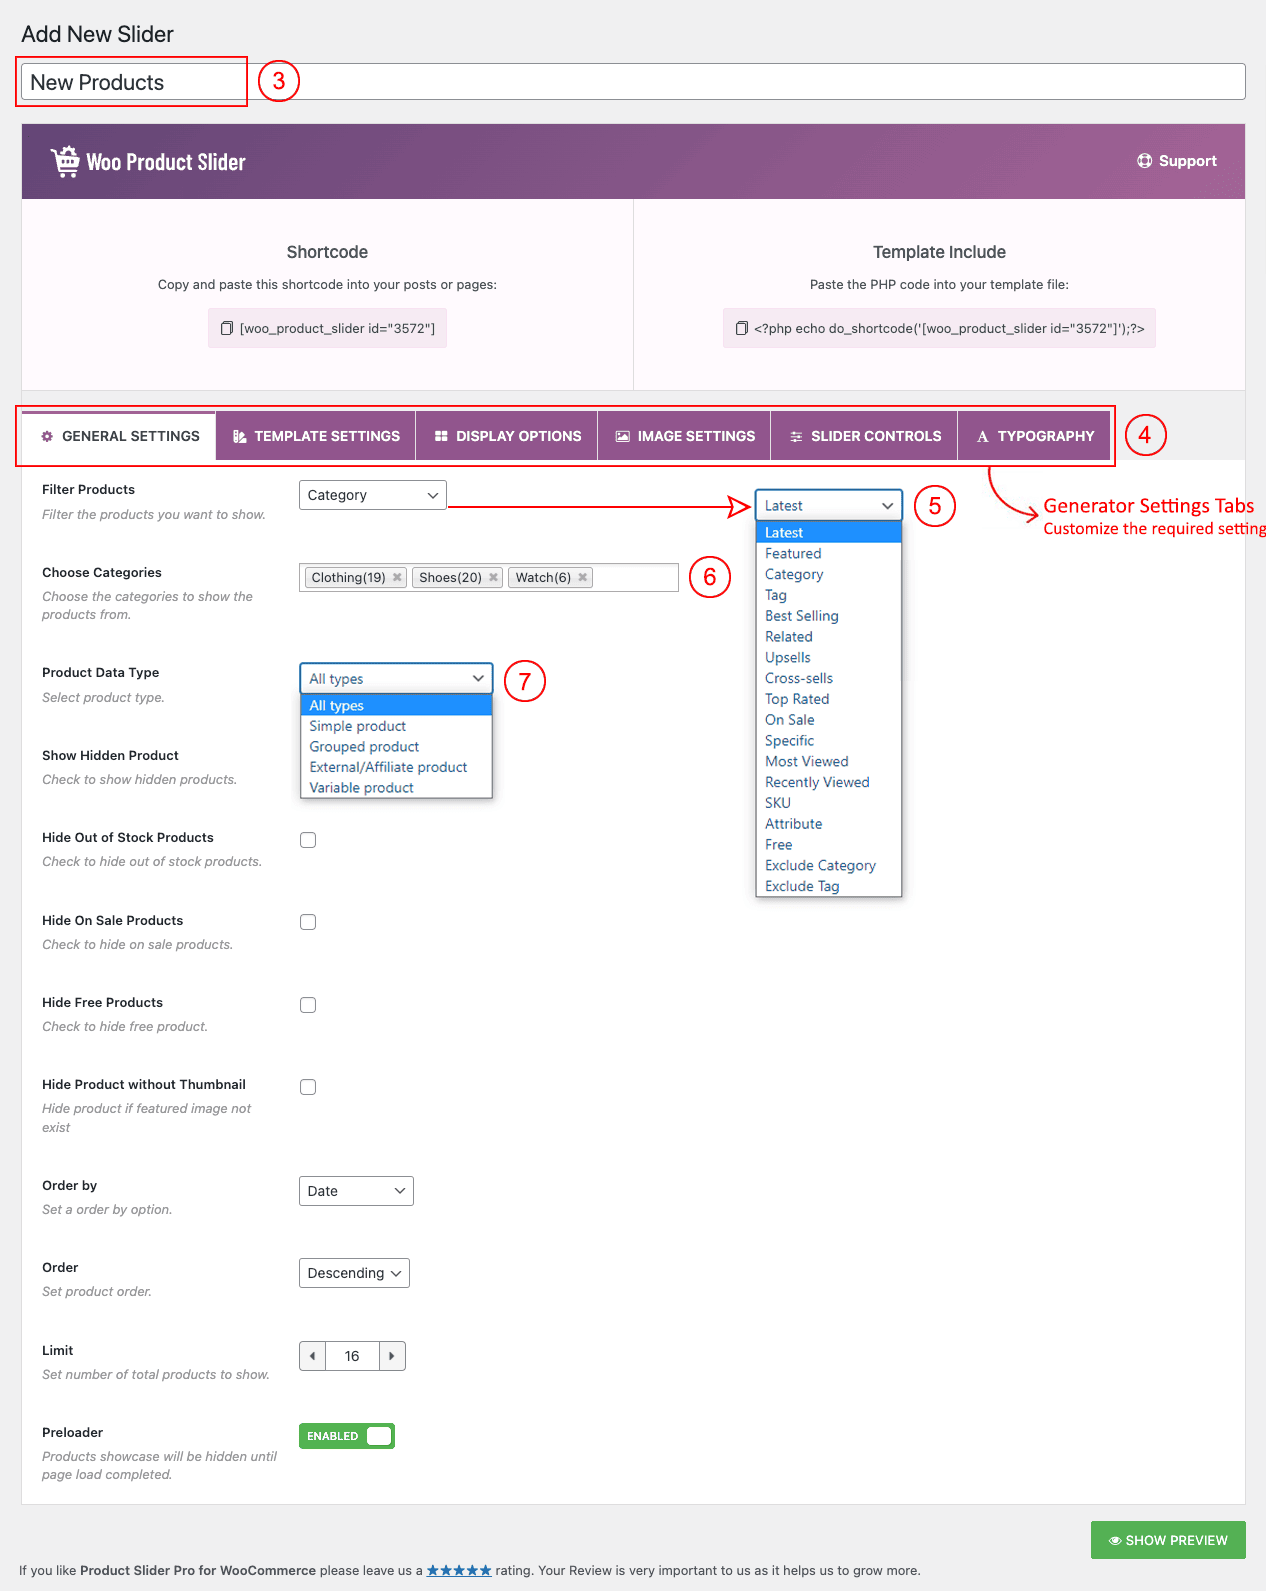
(3) Type a Shortcode Title used as a Section Title for your product slider or grid (optional).
(4) Customize Slider Generator Settings Fields as per your needs or wish.
(5) Filter Products from → 18 Types of Product Filtering options.
(6) Choose Categories from → product categories to show in the slider or grid.
(7) Select Product Data Type.
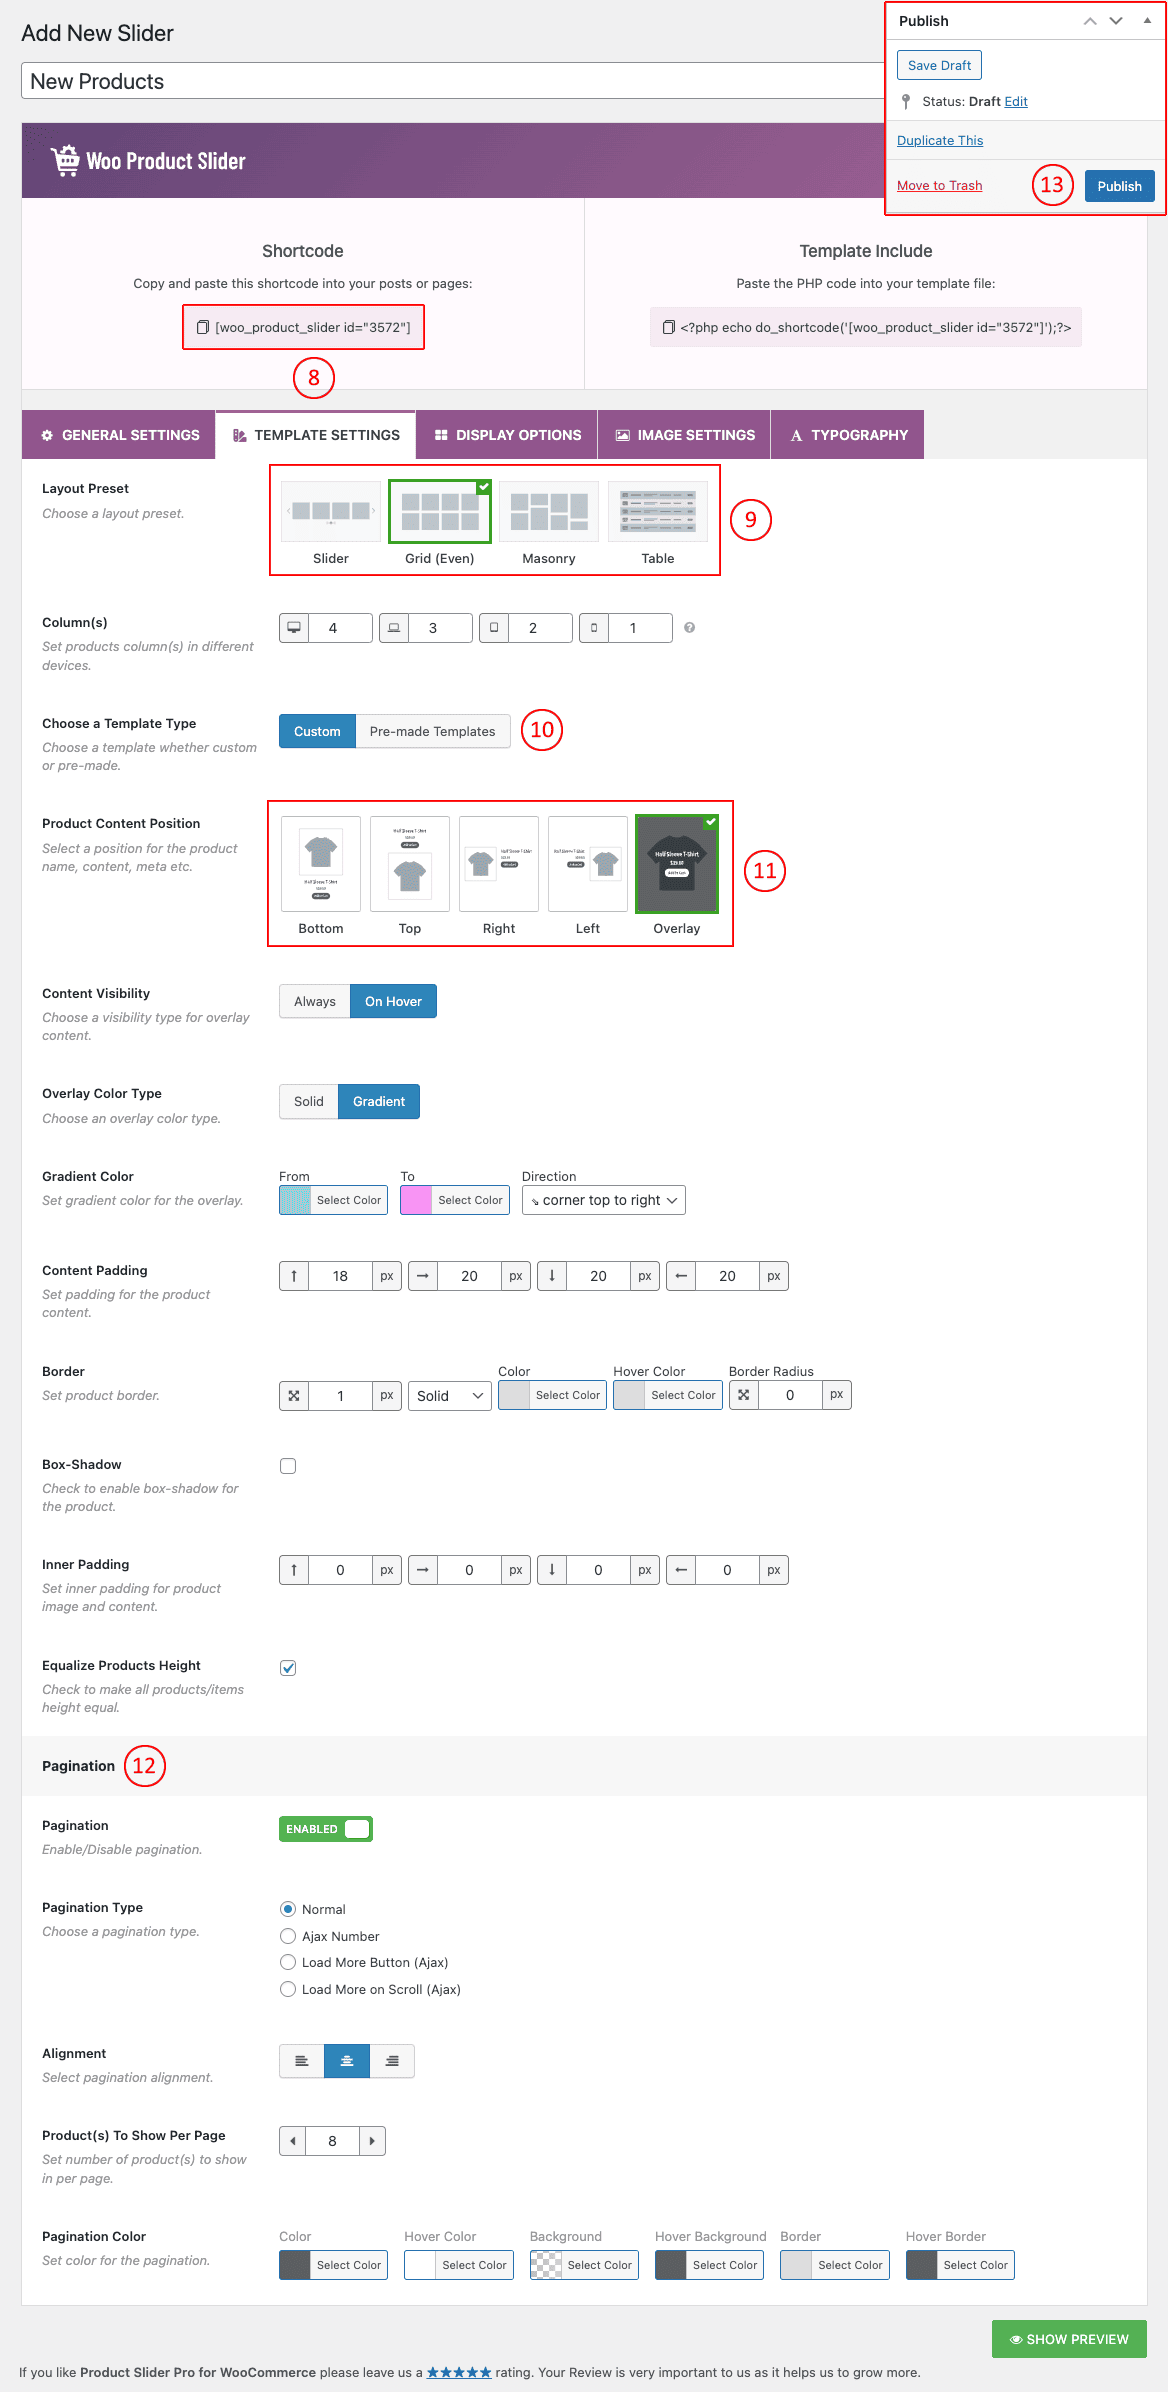
(8) Go to the → Templates Settings Tab to select your preferred layout and templates.
(9) Choose Layout Preset → Choose your preferred layout preset from here.
(10) Choose a Template Type → Choose Custom or Pre-made Templates (28 Pre-made Templates available).
(11) Product Content Position → Select a position for the product name, content, meta, etc (available when the Custom template is selected).
(12) Pagination → Enable/Disable pagination as you want (Pagination is showing in this tab as the Gird layout is selected).
(13) And then click on → Publish and you will see a Generated Shortcode in the top area.
STEP 2: COPY AND USE THE PRODUCT SLIDER SHORTCODE
- Copy and Paste the product slider shortcode to your post or page or anywhere on your site. By following these steps, you can create numerous sliders with various designs for your site.
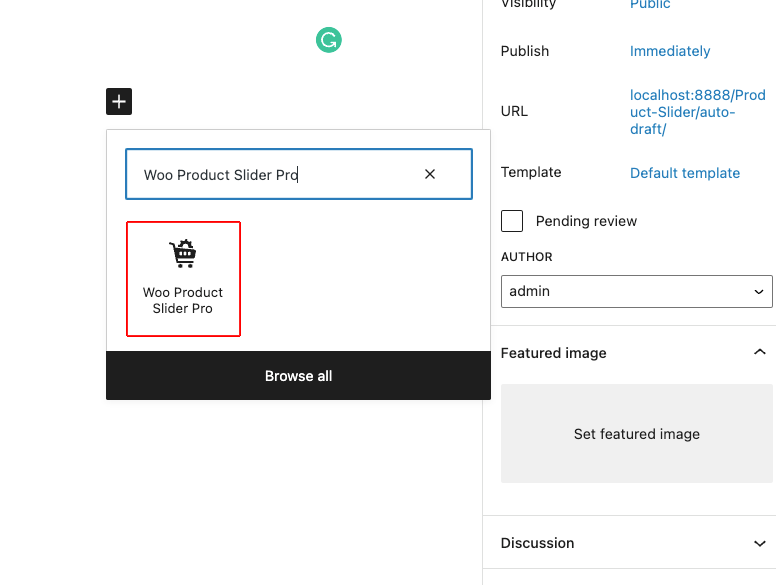
- You can also find the Woo Product Slider Pro shortcode in the Gutenberg block. Search for Woo Product Slider Pro and you will find it. Then select and add your desired shortcode.