Creating a Testimonial view is super easy and fast. It can be done within a minute.
STEP 1: GENERATE A TESTIMONIAL VIEW
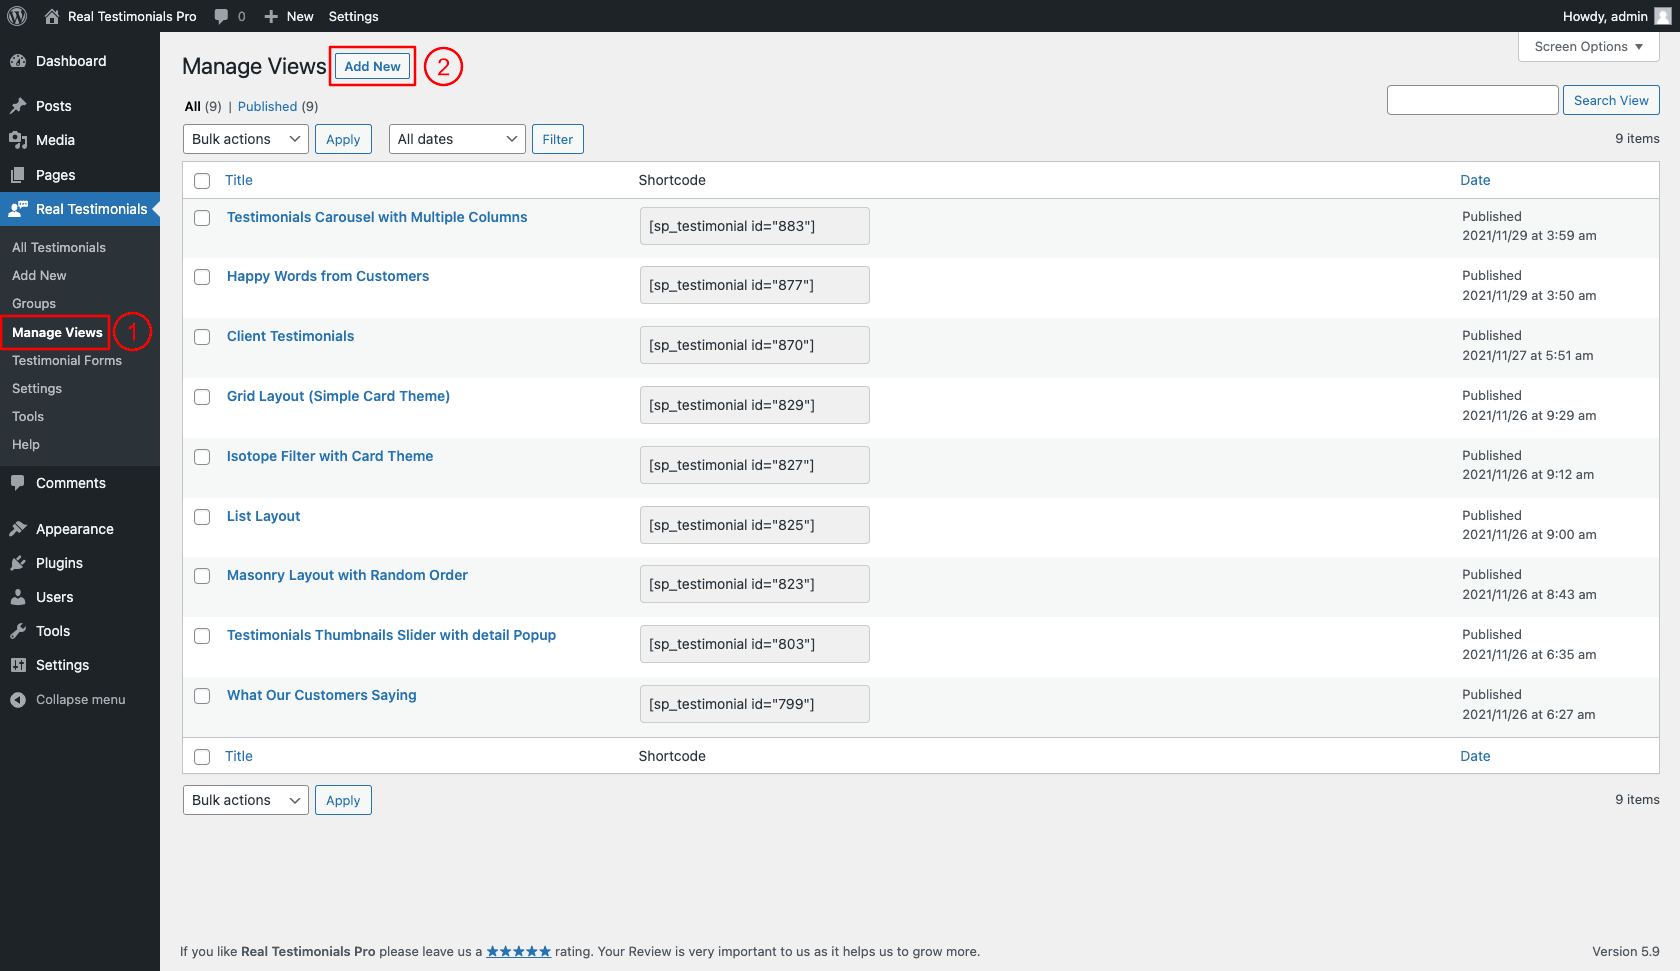
(1) Click on the Manage Views menu.
(2) Click on the Add New button.
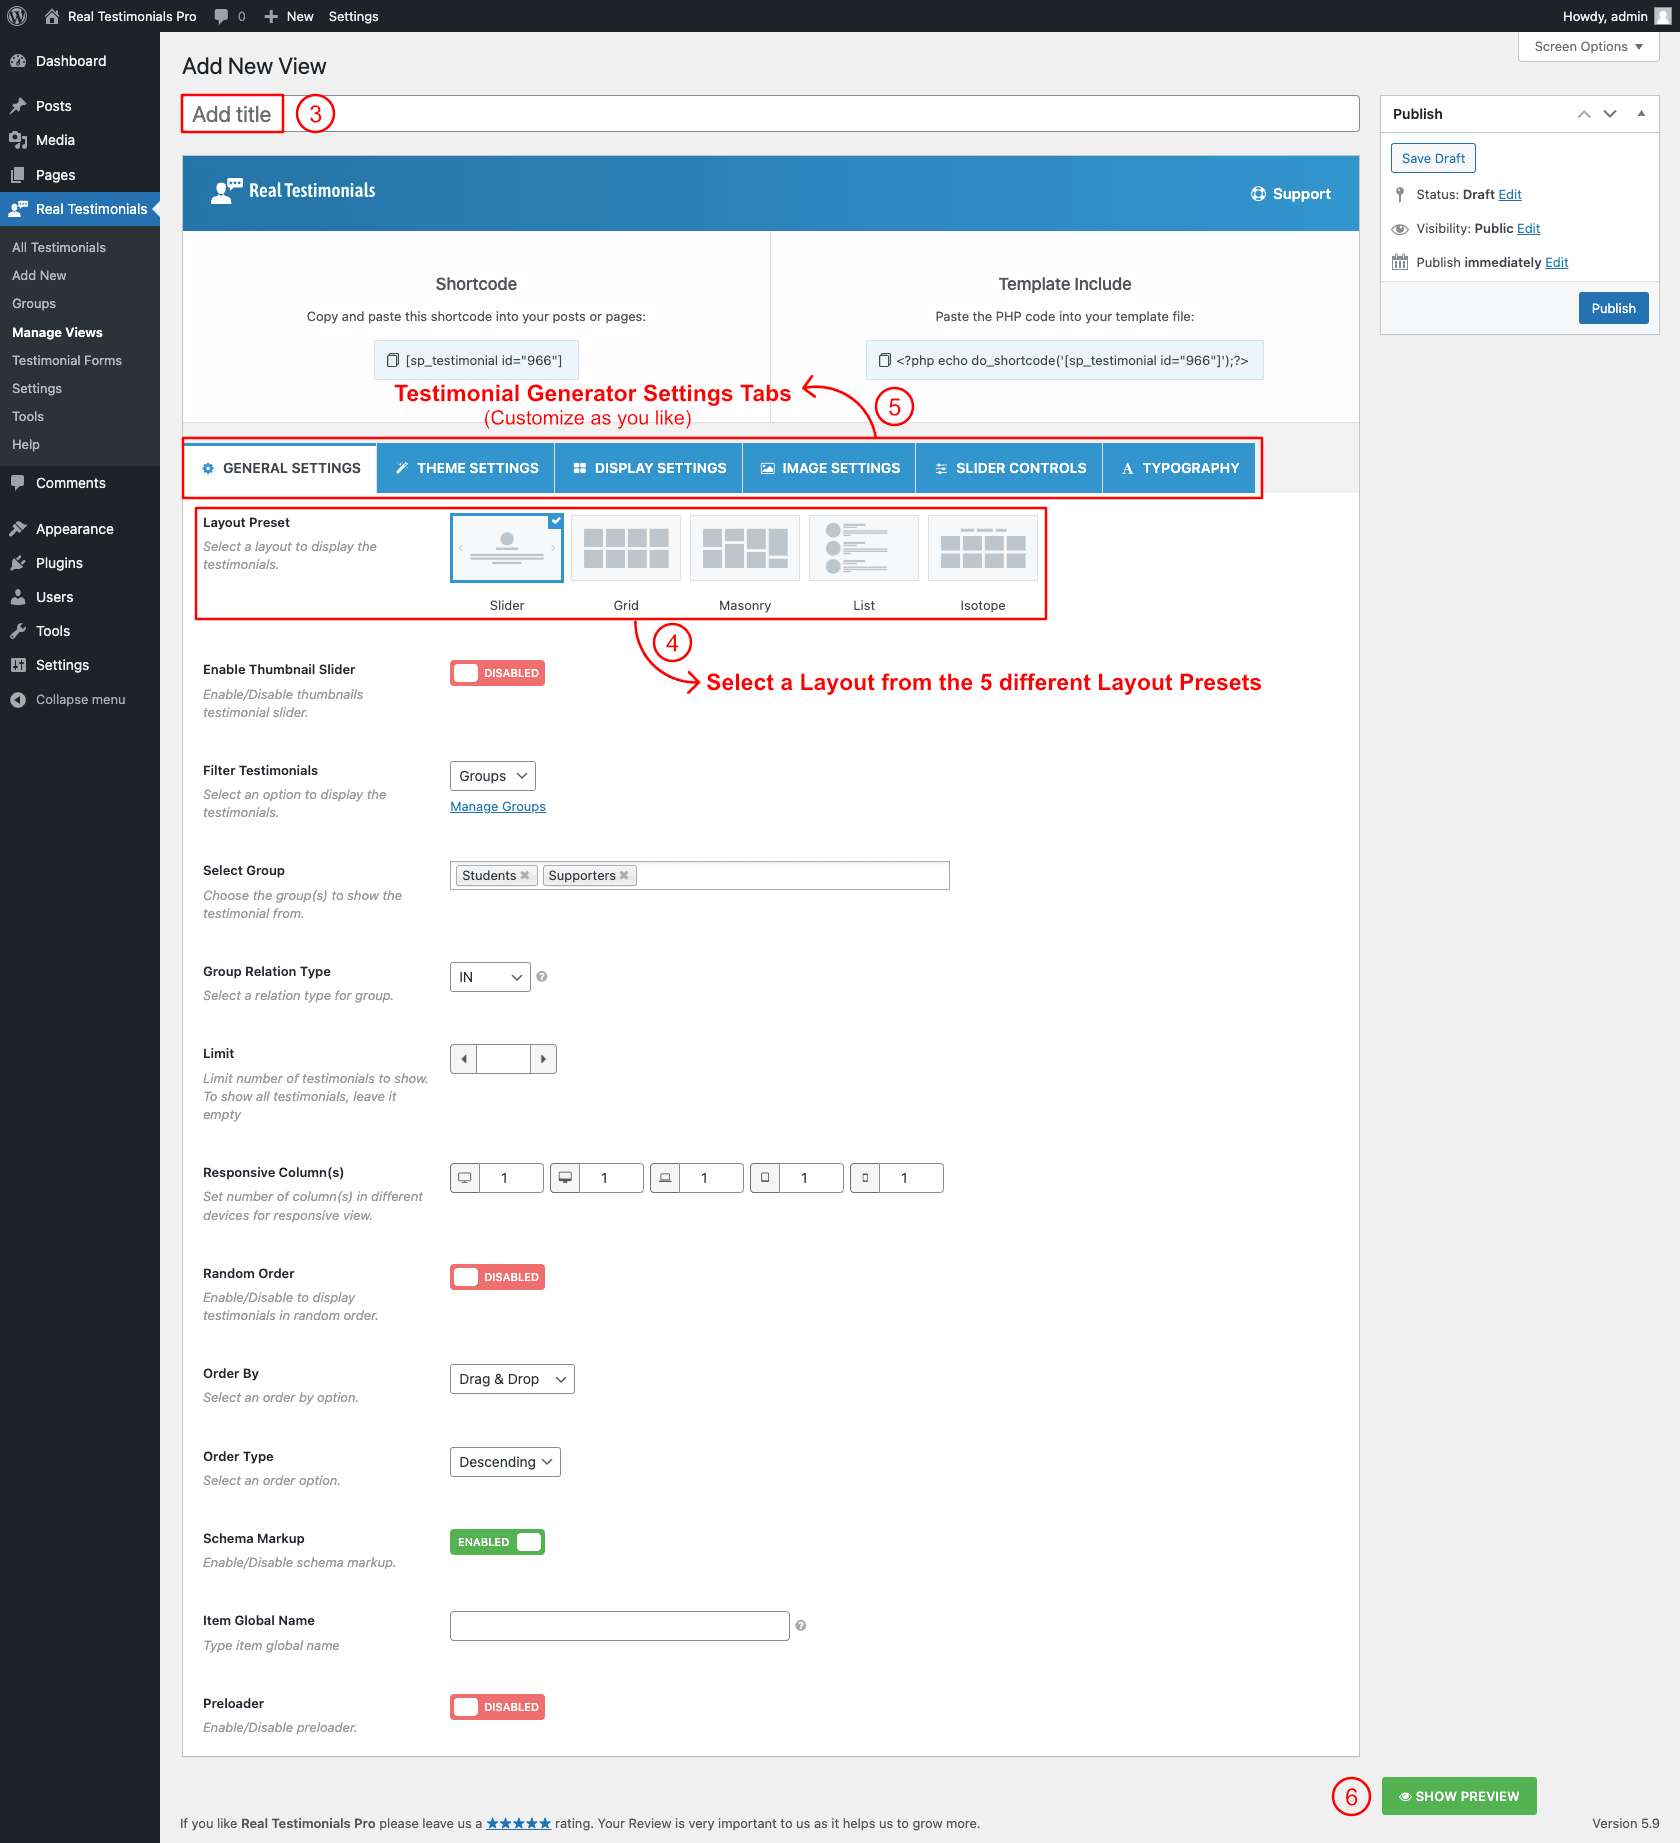
(3) Type a Title for your testimonial showcase (optional).
(4) Select a Layout from→ Layout Presets (Slider, Grid, Masonry, List, Filter).
(5) You can Customize the Testimonial View Generator Setting Tabs as you want. Every layout has its own Settings Tabs.
(6) Show Preview: Before publishing the shortcode and displaying it on your web pages you can have a look at the live preview of the customization you have made. Click show preview to see a live preview of the show.
STEP 2: COPY AND USE THE TESTIMONIAL VIEW SHORTCODE
The Testimonial View Shortcode will be found below the shortcode title.
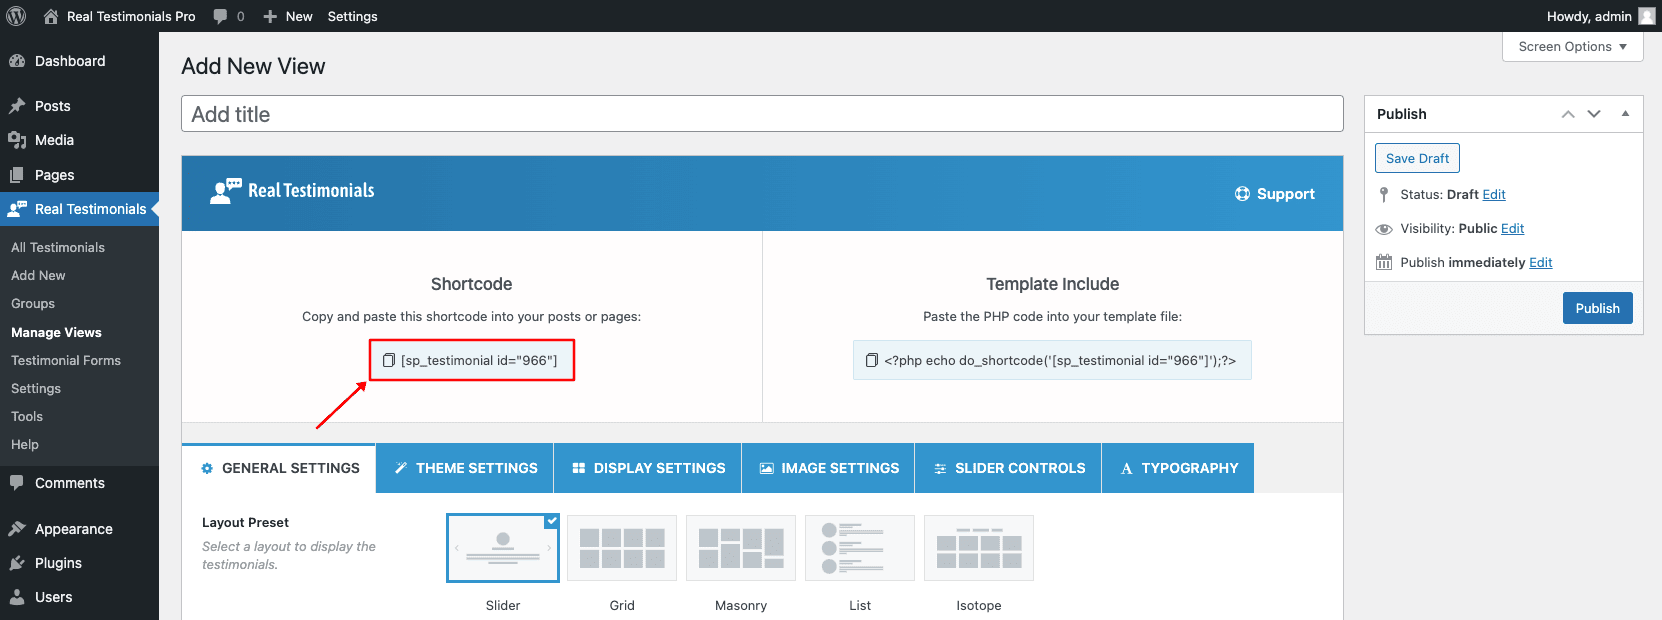
After clicking on the publish button, A Testimonial View Shortcode and PHP function will be created in the upper section. Copy The Shortcode.
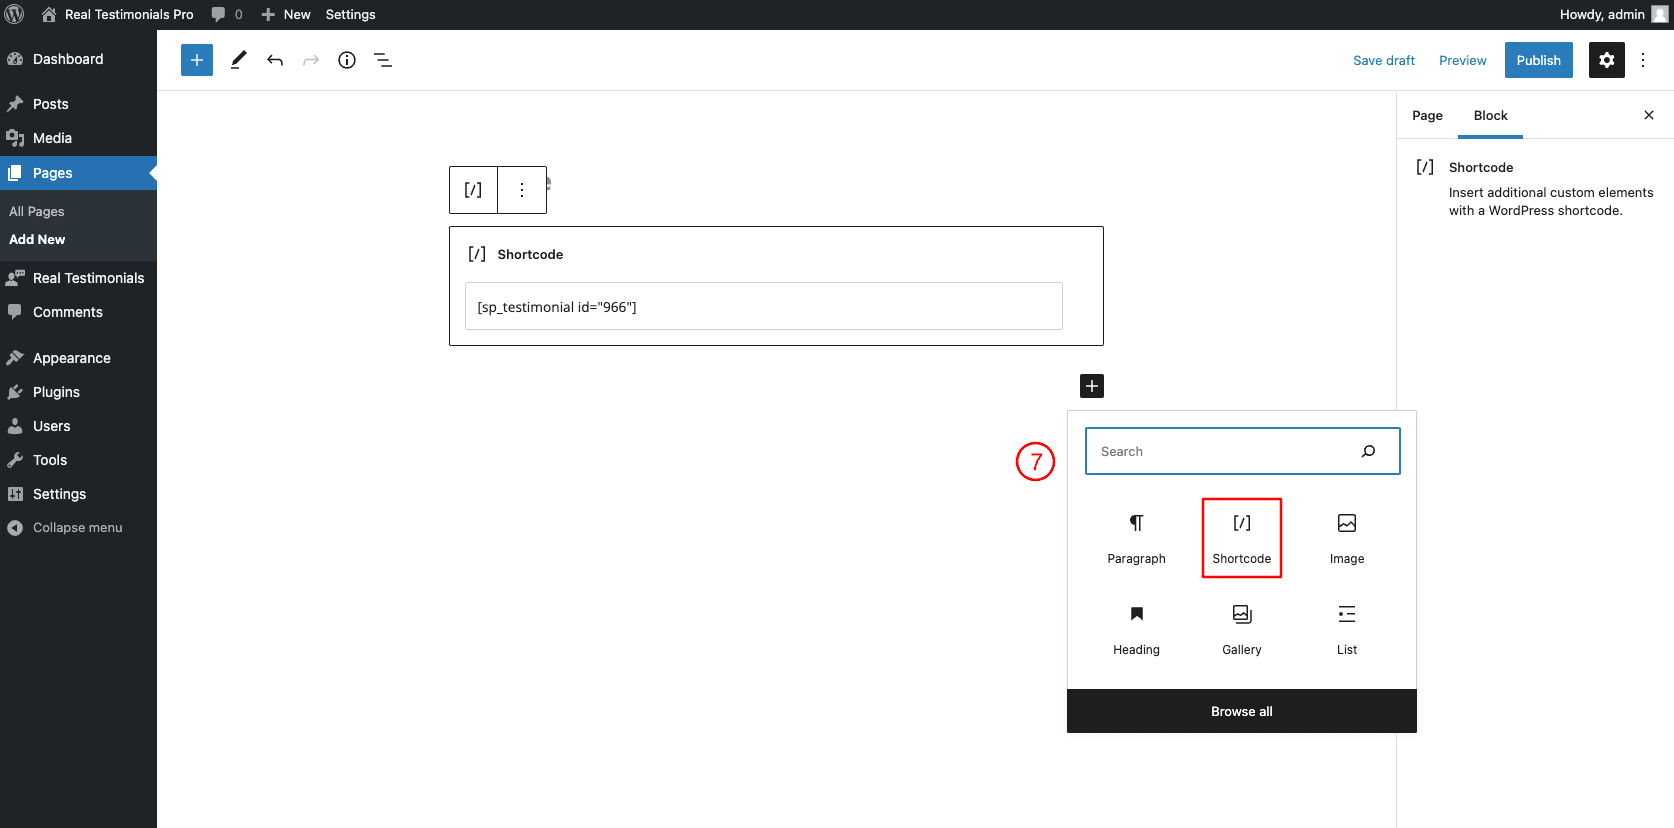
(7) Paste the Testimonial View Shortcode inside a Shortcode block. The Paragraph block and Text block also support the shortcode. Click on the Publish or Update button of the page to save changes.