
(1) Section Title: Users can show or hide the Carousel Title on top of the carouse section by using this option. By default, it shows the section title in the carousel. If you want to hide the carousel section title, then you can hide it by using this button.
The section title is mostly used to identify the slider on the pages. As the title of the shortcode becomes visible it becomes easier to identify which shortcode has been used on this specific section or page.
(2) Section Title Color: Using this option a user will be able to change the Section Title color that appears on top of the slider if the Section Title option is On.
(3) Margin from Section Title: You can adjust the Carousel Section title margin by using Margin from Section Title. The section title can be adjusted from Left, Right, Top, and Bottom using these fields.
(4) Space Between Categories: By default, 20px space is set between the categories in the slider. Users have the freedom to increase/decrease the space between the categories from this option.
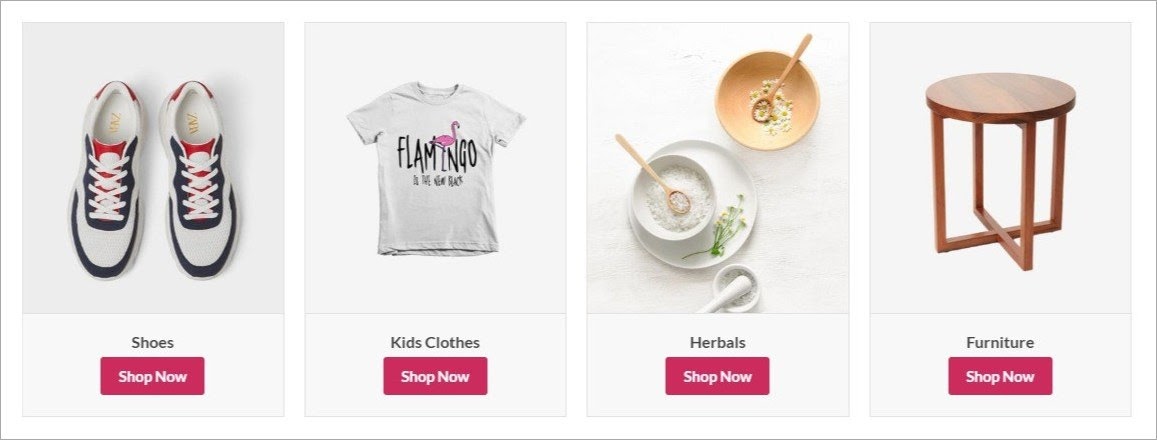
(5) Category Content position: Determines the position of contents like “Title and Shop Now button”. Users can choose from five different layouts while the free version has only one layout “Below Content” which will make the category slider show contents below the category image.
(6) Make it Card Style: If you want to show all the content in a single Block like a card then you need to check this option.
(7) Border: Sets border around the Category contents. Users can also adjust the border color and border hover color with this option.
(8) Background: Changes the category contents background color and hover background color.
(9) Inner Padding: Adds padding between the Category Contents and the Category Content Border.
(10) Category Name: If you want to show the category name on the Content Area please enable the Category Name button otherwise the category name will not appear in the content section.
(11) Category Name Color: Give the category name a Color from here. You can choose any color from the color picker.
(12) Category Name Margin: To apply a margin to the category name you can use this feature. The margin will be counted from the Category content border.
(13) Product Count: You can use this option to show the total number of products listed in this category. A number with braces will appear beside or under the Category Name inside the Category Content section.
(14) Product Count Position: You can make the product count appear beside or under the Category name using Product Count Position.
(15) Product Count Before: Here you can define the character or text that will appear before the product count number.
(16) Product Count After: Here you can define the character or text that will appear after the product count number.
(17) Description: Enabling this will show the category description under the category name.
(18) Description Color: You can change the description text color from here.
(19) Description Margin: Adds margin to the logo description that appears on the carousel. Using this you will be able to add margins to the Right, Left, Top, and Bottom of the Logo Description.
(20) Shop Now Button: Adds a “Shop Now” button in the Category Content section through which a user can navigate to the product single page.
(21) Shop Now Button Label: You can change the button label from here. The default value is “Shop Now”. You can add any text as you want. It can be Buy, Purchase, or anything else.
(22) Shop Now Button Color: The shop now button color can be changed from here. Users can define the Shop Now button text color, text hover color, background color, and the Background Hover color from here.
(23) Shop Now Button Border: You can change the shop now button’s border color, border color on hover, and the border weight.
(24) Button Margin: This option allows a user to add Top, Bottom, Right and Left margin to the Shop Now button.
(25) Link Target:
| _blank | Open in a new window |
| _self | Open in the same frame as it was clicked |
| _parent | Open in the parent frameset |
| _top | Open in the full body of the window |
| Frame name | Open in a named frame |