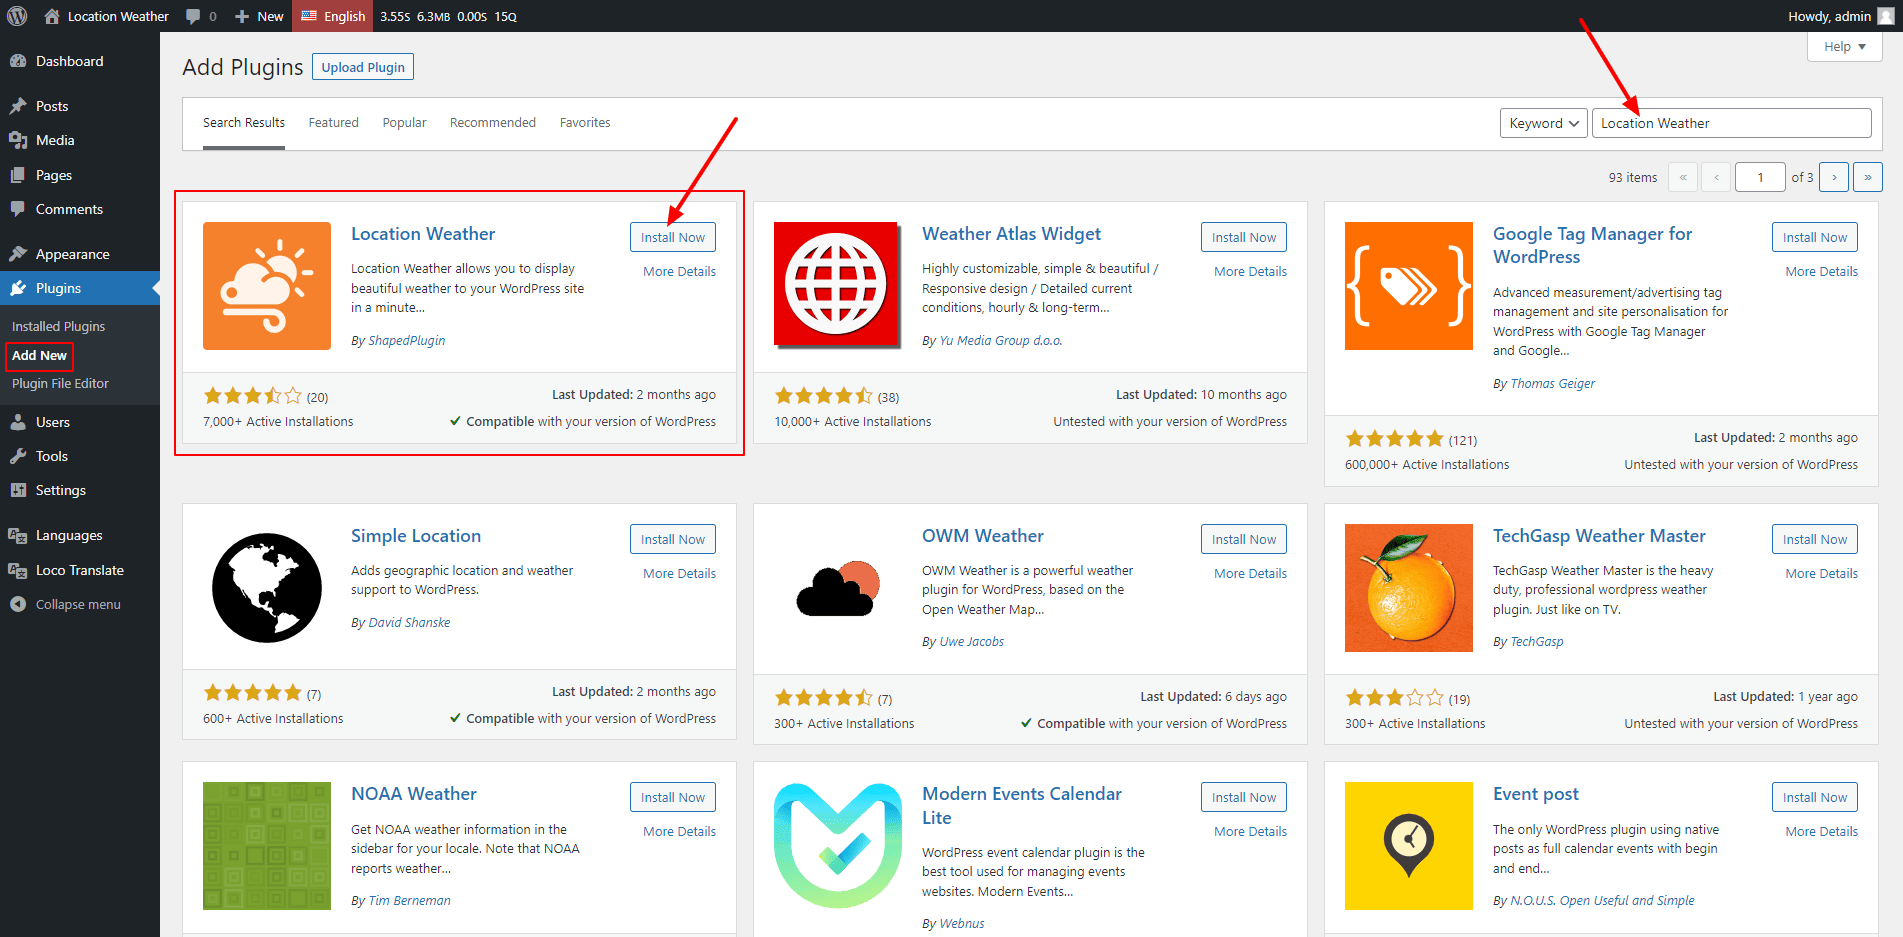
We assume that you have installed WordPress. If you do not have installed WordPress, contact your hosting provider, or see the documentation.
There are two different ways to install and activate the plugin.
1. Automatic Installation (Easiest Way)
To do an automatic install of Location Weather follow the process below:
- Login to your WordPress dashboard.
- Navigate to the Plugins menu, and click Add New.
- In the search field type Location Weather or Location Weather by ShapedPlugin.
- Once you have found it simply click on the Install and Activate button.

2. Manual Installation
A. Uploading in WordPress Dashboard
- Download location-weather.zip from WordPress.org.
- Navigate to the Plugins → Add New in your WordPress Dashboard.
- Navigate to the Upload area.
- Select location-weather.zip from your computer.
- Click Install Now.
- Activate the plugin in the Plugins dashboard.
B. Using FTP
- Download location-weather.zip from WordPress.org.
- Extract the location-weather directory to your computer.
- Upload the location-weather directory to the /wp-content/plugins/directory.
- Activate the plugin in the Plugin dashboard.
API Key
To get started with the plugin, you need an API Key from the OpenWeatherMap for your site.
Get your API Key from here→ https://openweathermap.org/appid