Creating a Testimonial View is super easy and fast. It can be done within a minute. A-Z guidance has been described here for the first time or new users.

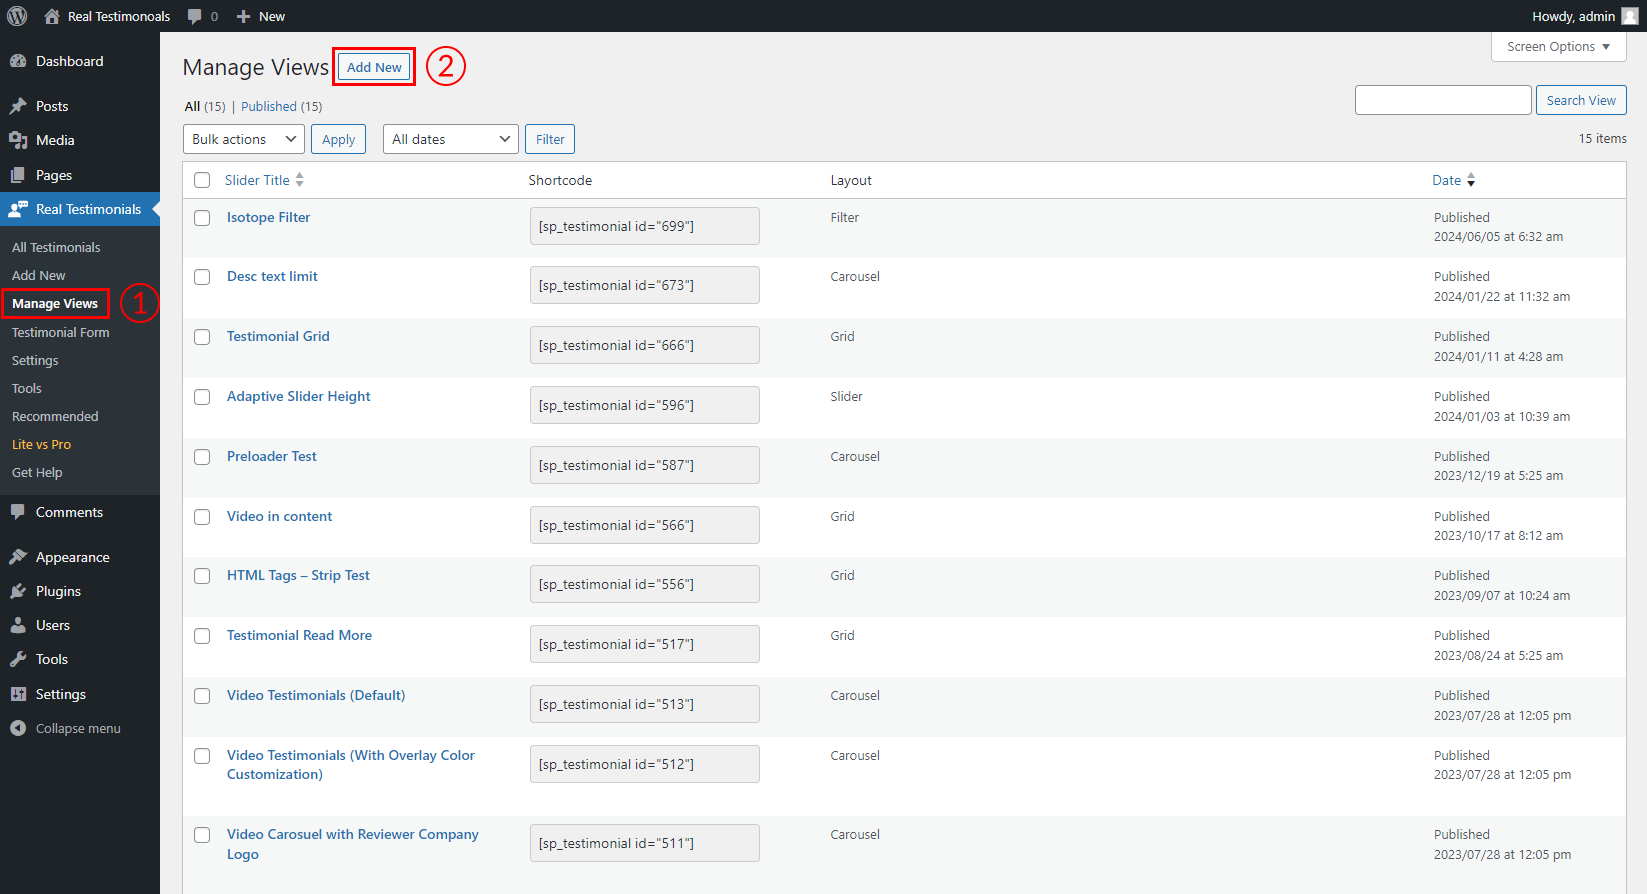
(1) Click on the Manage Views menu.
(2) Click on the Add New button.

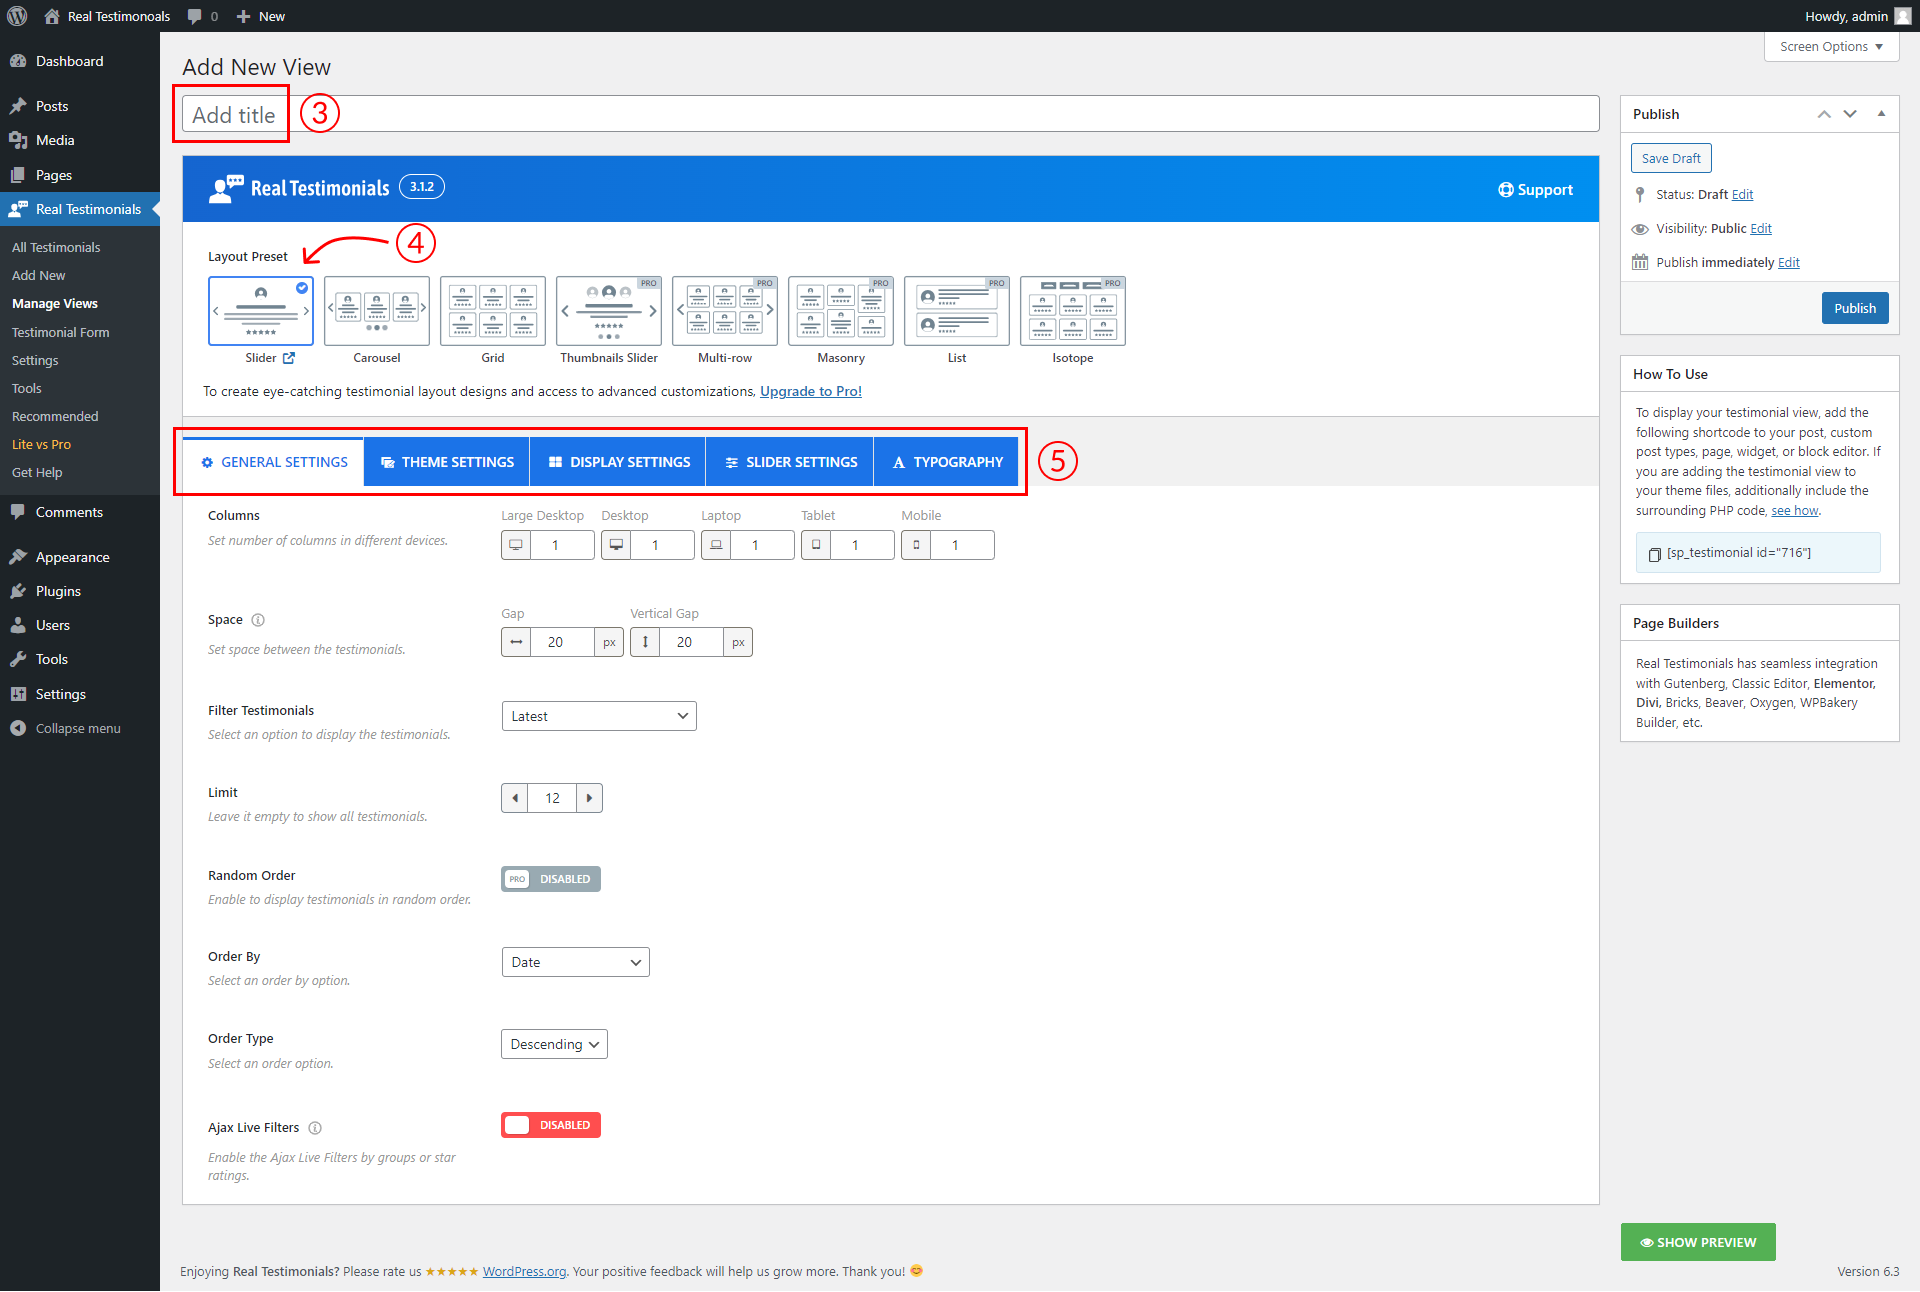
(3) Type a Testimonial View Title used as a Section Title for your slider or carousel (optional).
(4) Select a Layout Preset for your testimonials from three different layouts.
(5) You can Customize the Testimonial View from the shortcode setting tabs as you want. Then click on the Publish button to publish the testimonial view.

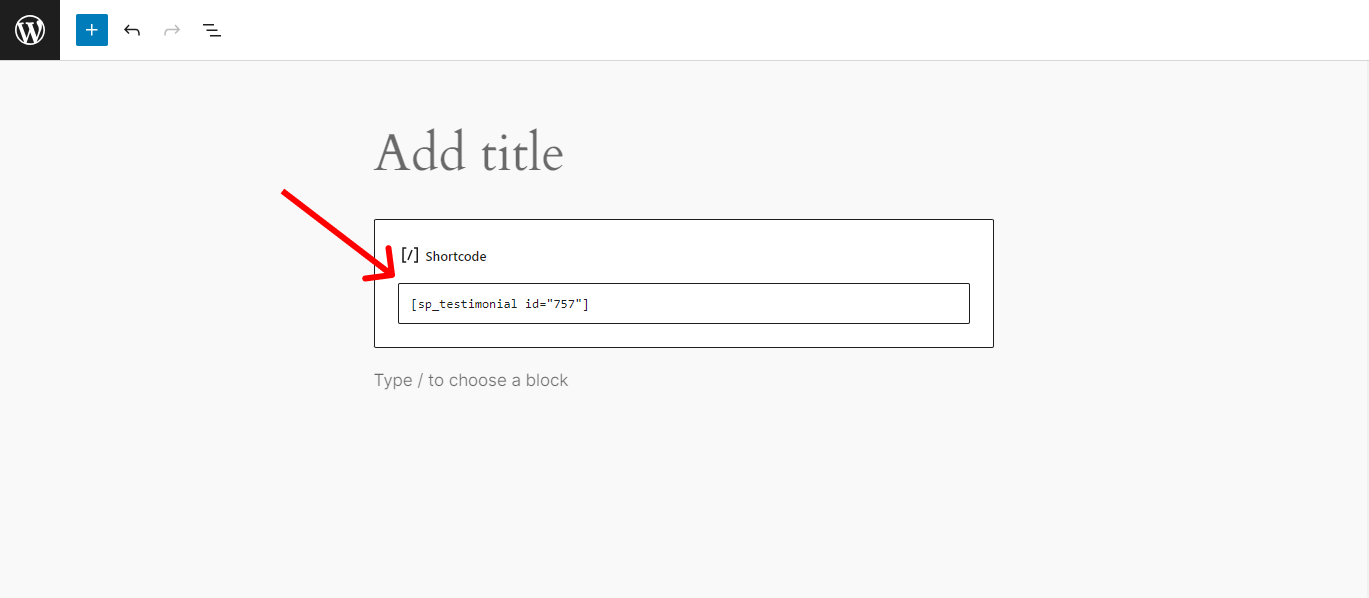
(6) After clicking on the publish button, Copy the Shortcode and paste it into Webpages, Widgets, or anywhere you want to display your Testimonial View.

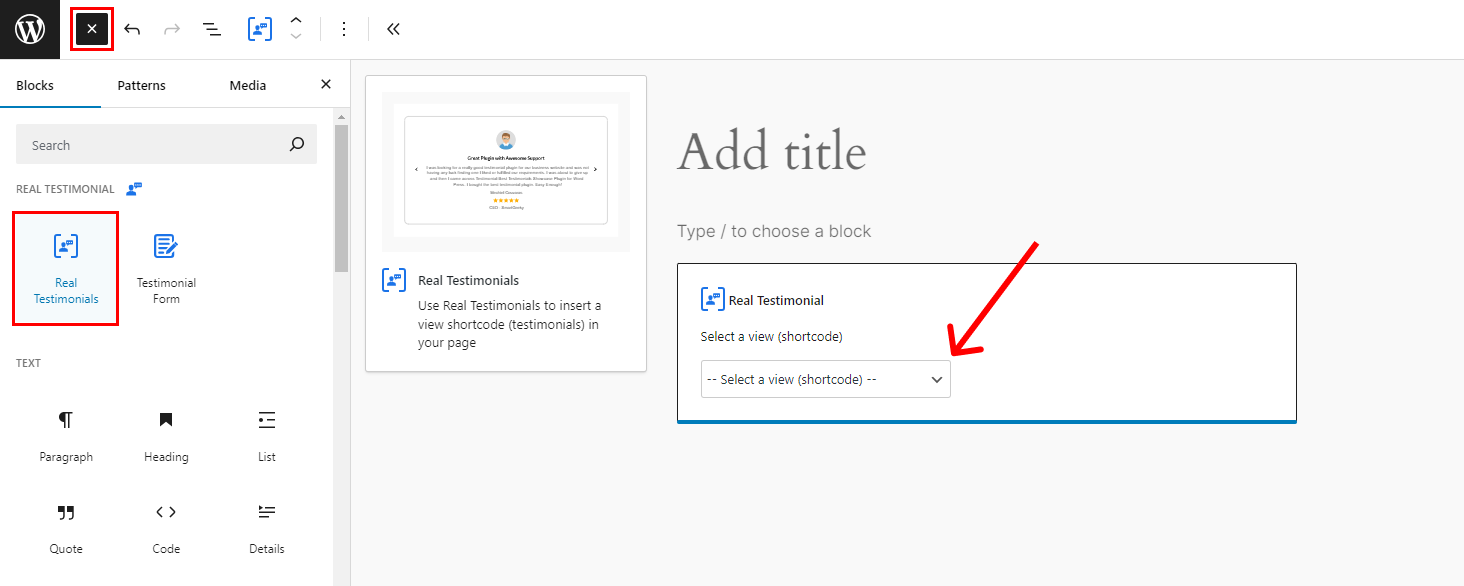
You can also use the Real Testimonials block to add the testimonials view on your site.

FAQs:
Q: How to add the Testimonial View to your theme PHP files?
Ans: Paste the PHP code into your template file:
<?php echo do_shortcode( '[sp_testimonial id="xxx"]' ); ?>
P.S. Note: Please use your shortcode ID instead of xxx